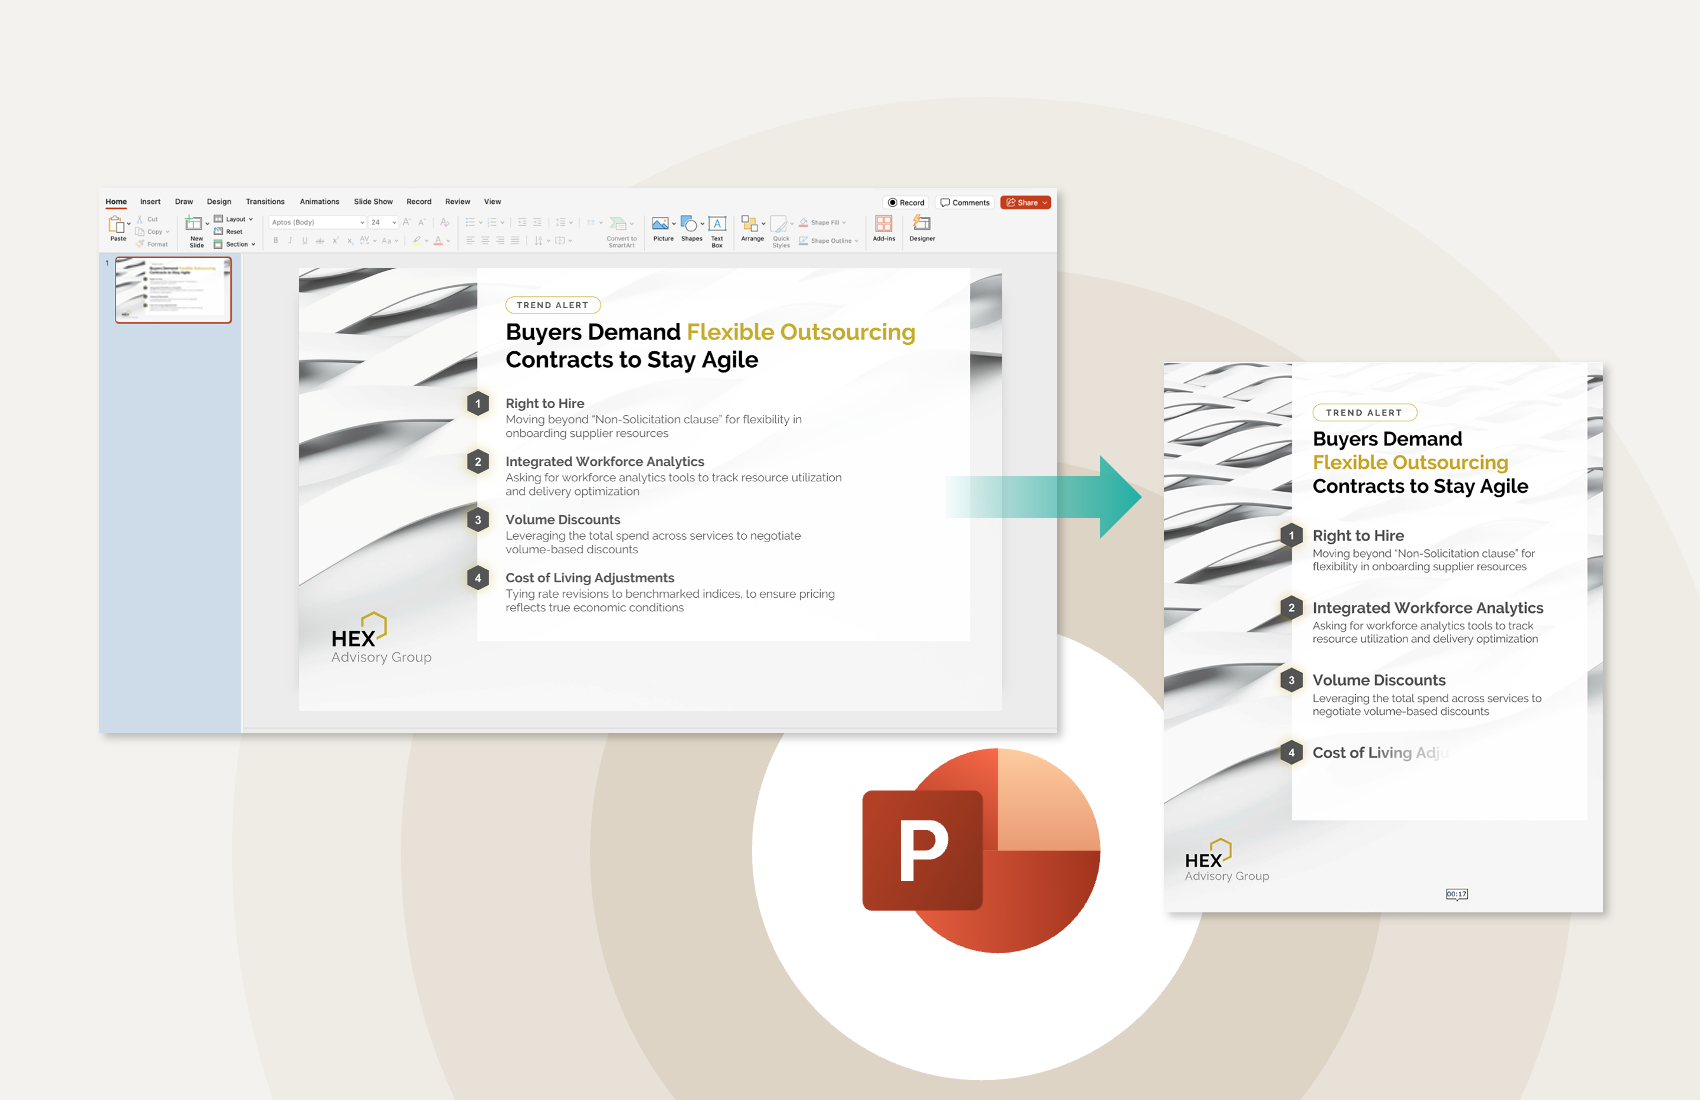
Export slides and objects as images in PowerPoint
August 30, 2025 | 4 min read

“I just needed one damn image to promote a thought leadership chart on LinkedIn.”
That’s how it started.
A CMO had the full deck in front of her. Research done. Presentation designed. One chart on slide 9 had the insight she wanted to post.
Now she had two choices:
Wait till morning for her designer to whip it up in Adobe.
Or DIY it. right there, right then – instead of raising a request and waiting till the next day.
And yet PowerPoint’s more than just a slide tool – it’s a design sandbox for proposals, banners, LinkedIn posts, pitch decks, brochures, and internal comms.
Whether you’re a marketer, consultant, or analyst chances are you’ve thought:
“How do I export this one slide as an image?”
Or
“How do I save just this graphic as image not the whole slide?”
This blog is your step-by-step, image-exporting guide – PNGs, JPEGs, transparent backgrounds – all covered.
Scenario 1. Export an entire slide as an image (PNG or JPEG)
Use this when you need the whole slide exported – for social media, thumbnails, banners, or email-ready visuals.

Open your presentation and go to the slide you want to export
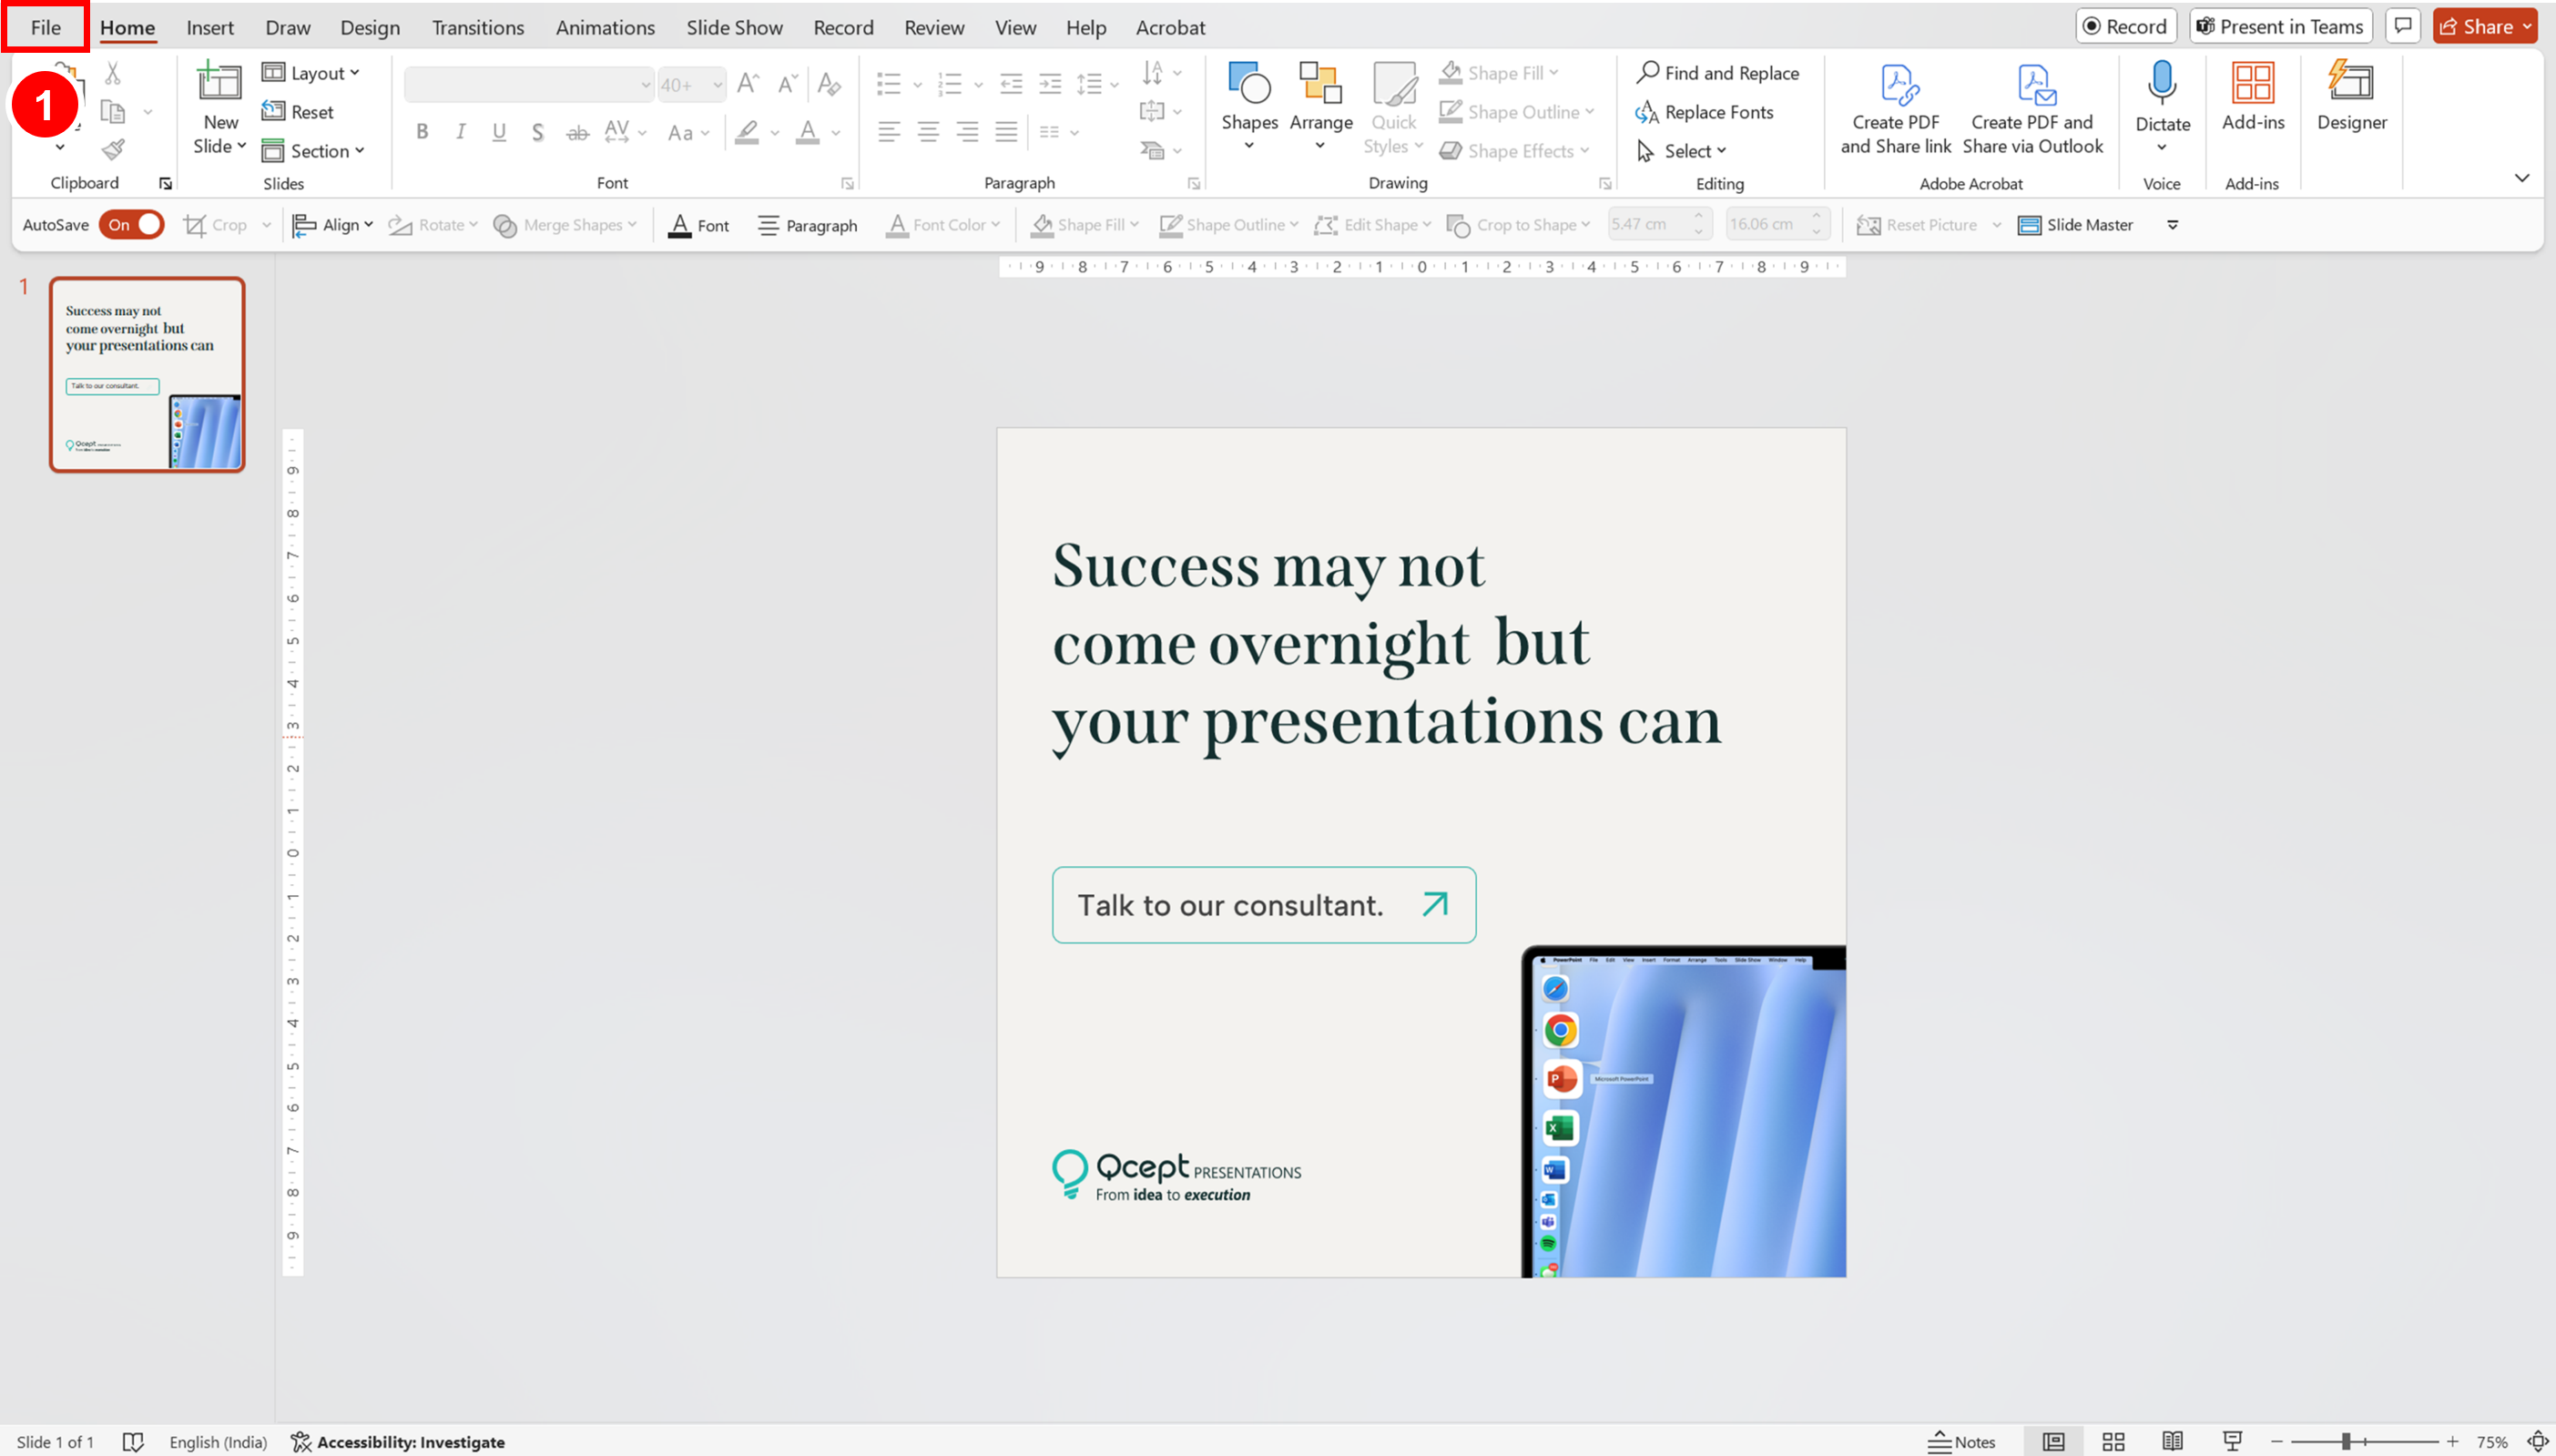
- Click File (top-left corner).
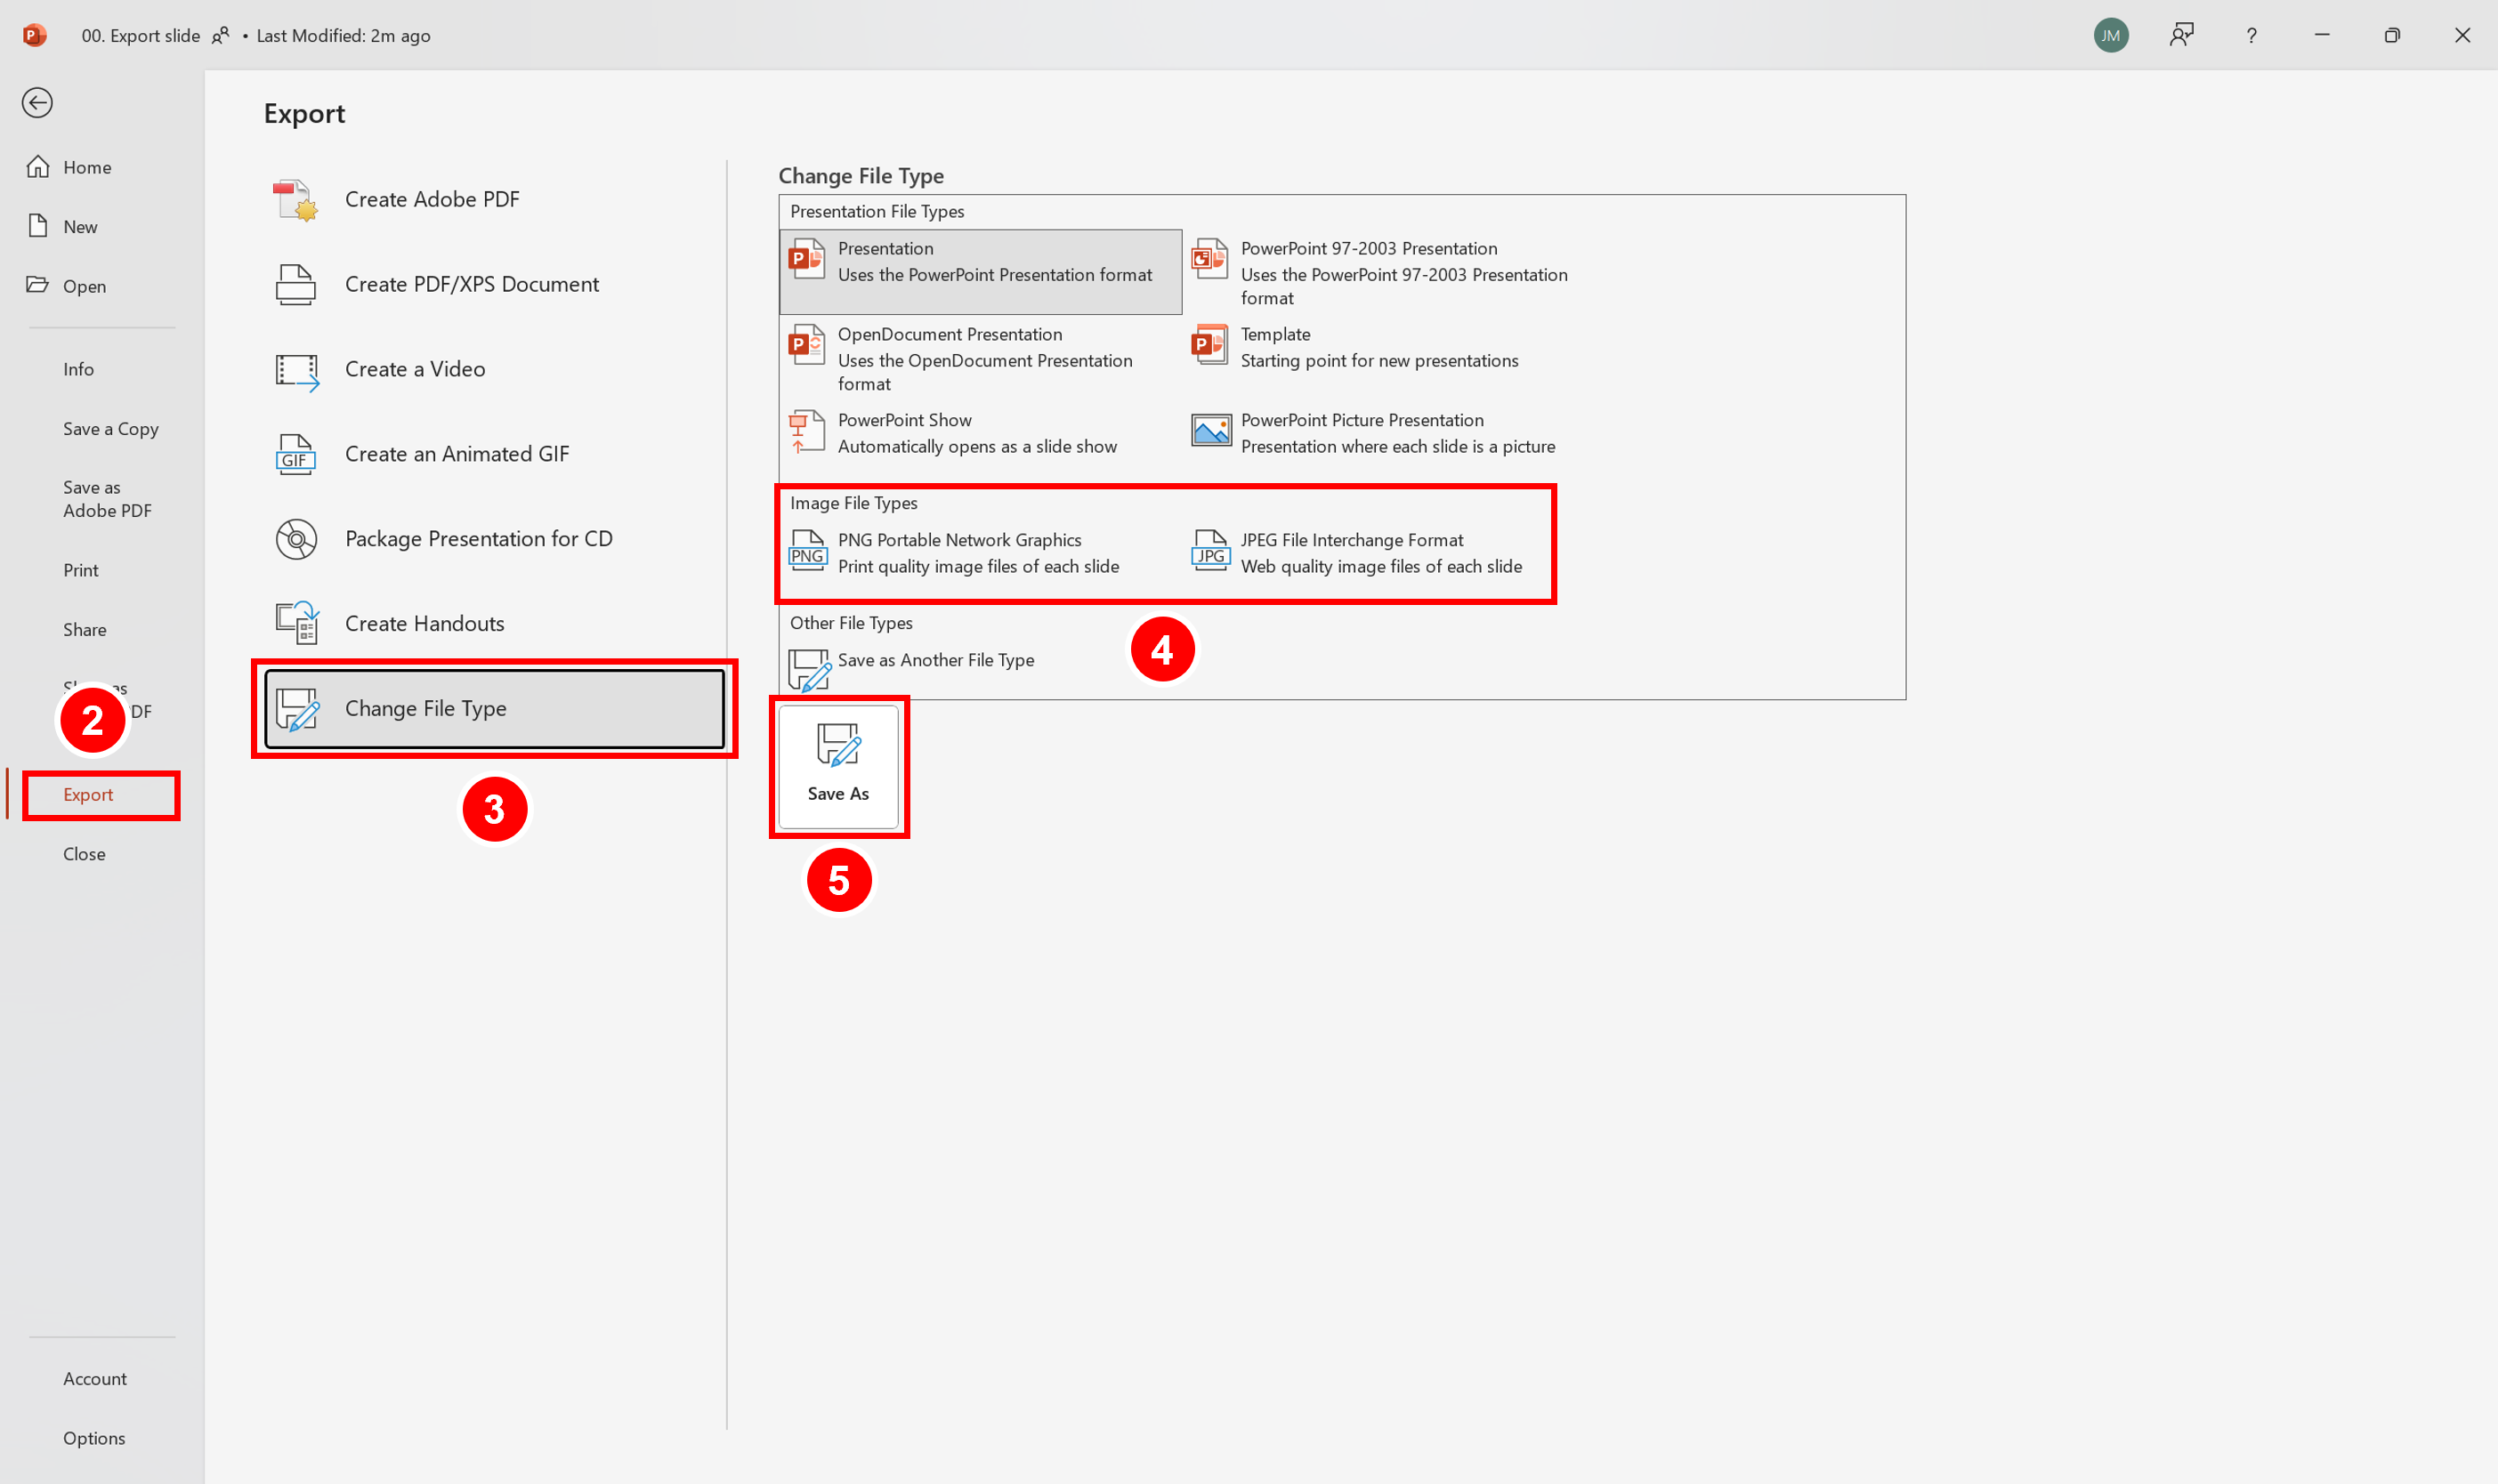
2. Select Export from the left-hand menu.
3. Click Change File Type.
4. Under Image File Types, choose PNG Portable Network Graphics or JPEG File Interchange Format.
5. Click Save As.
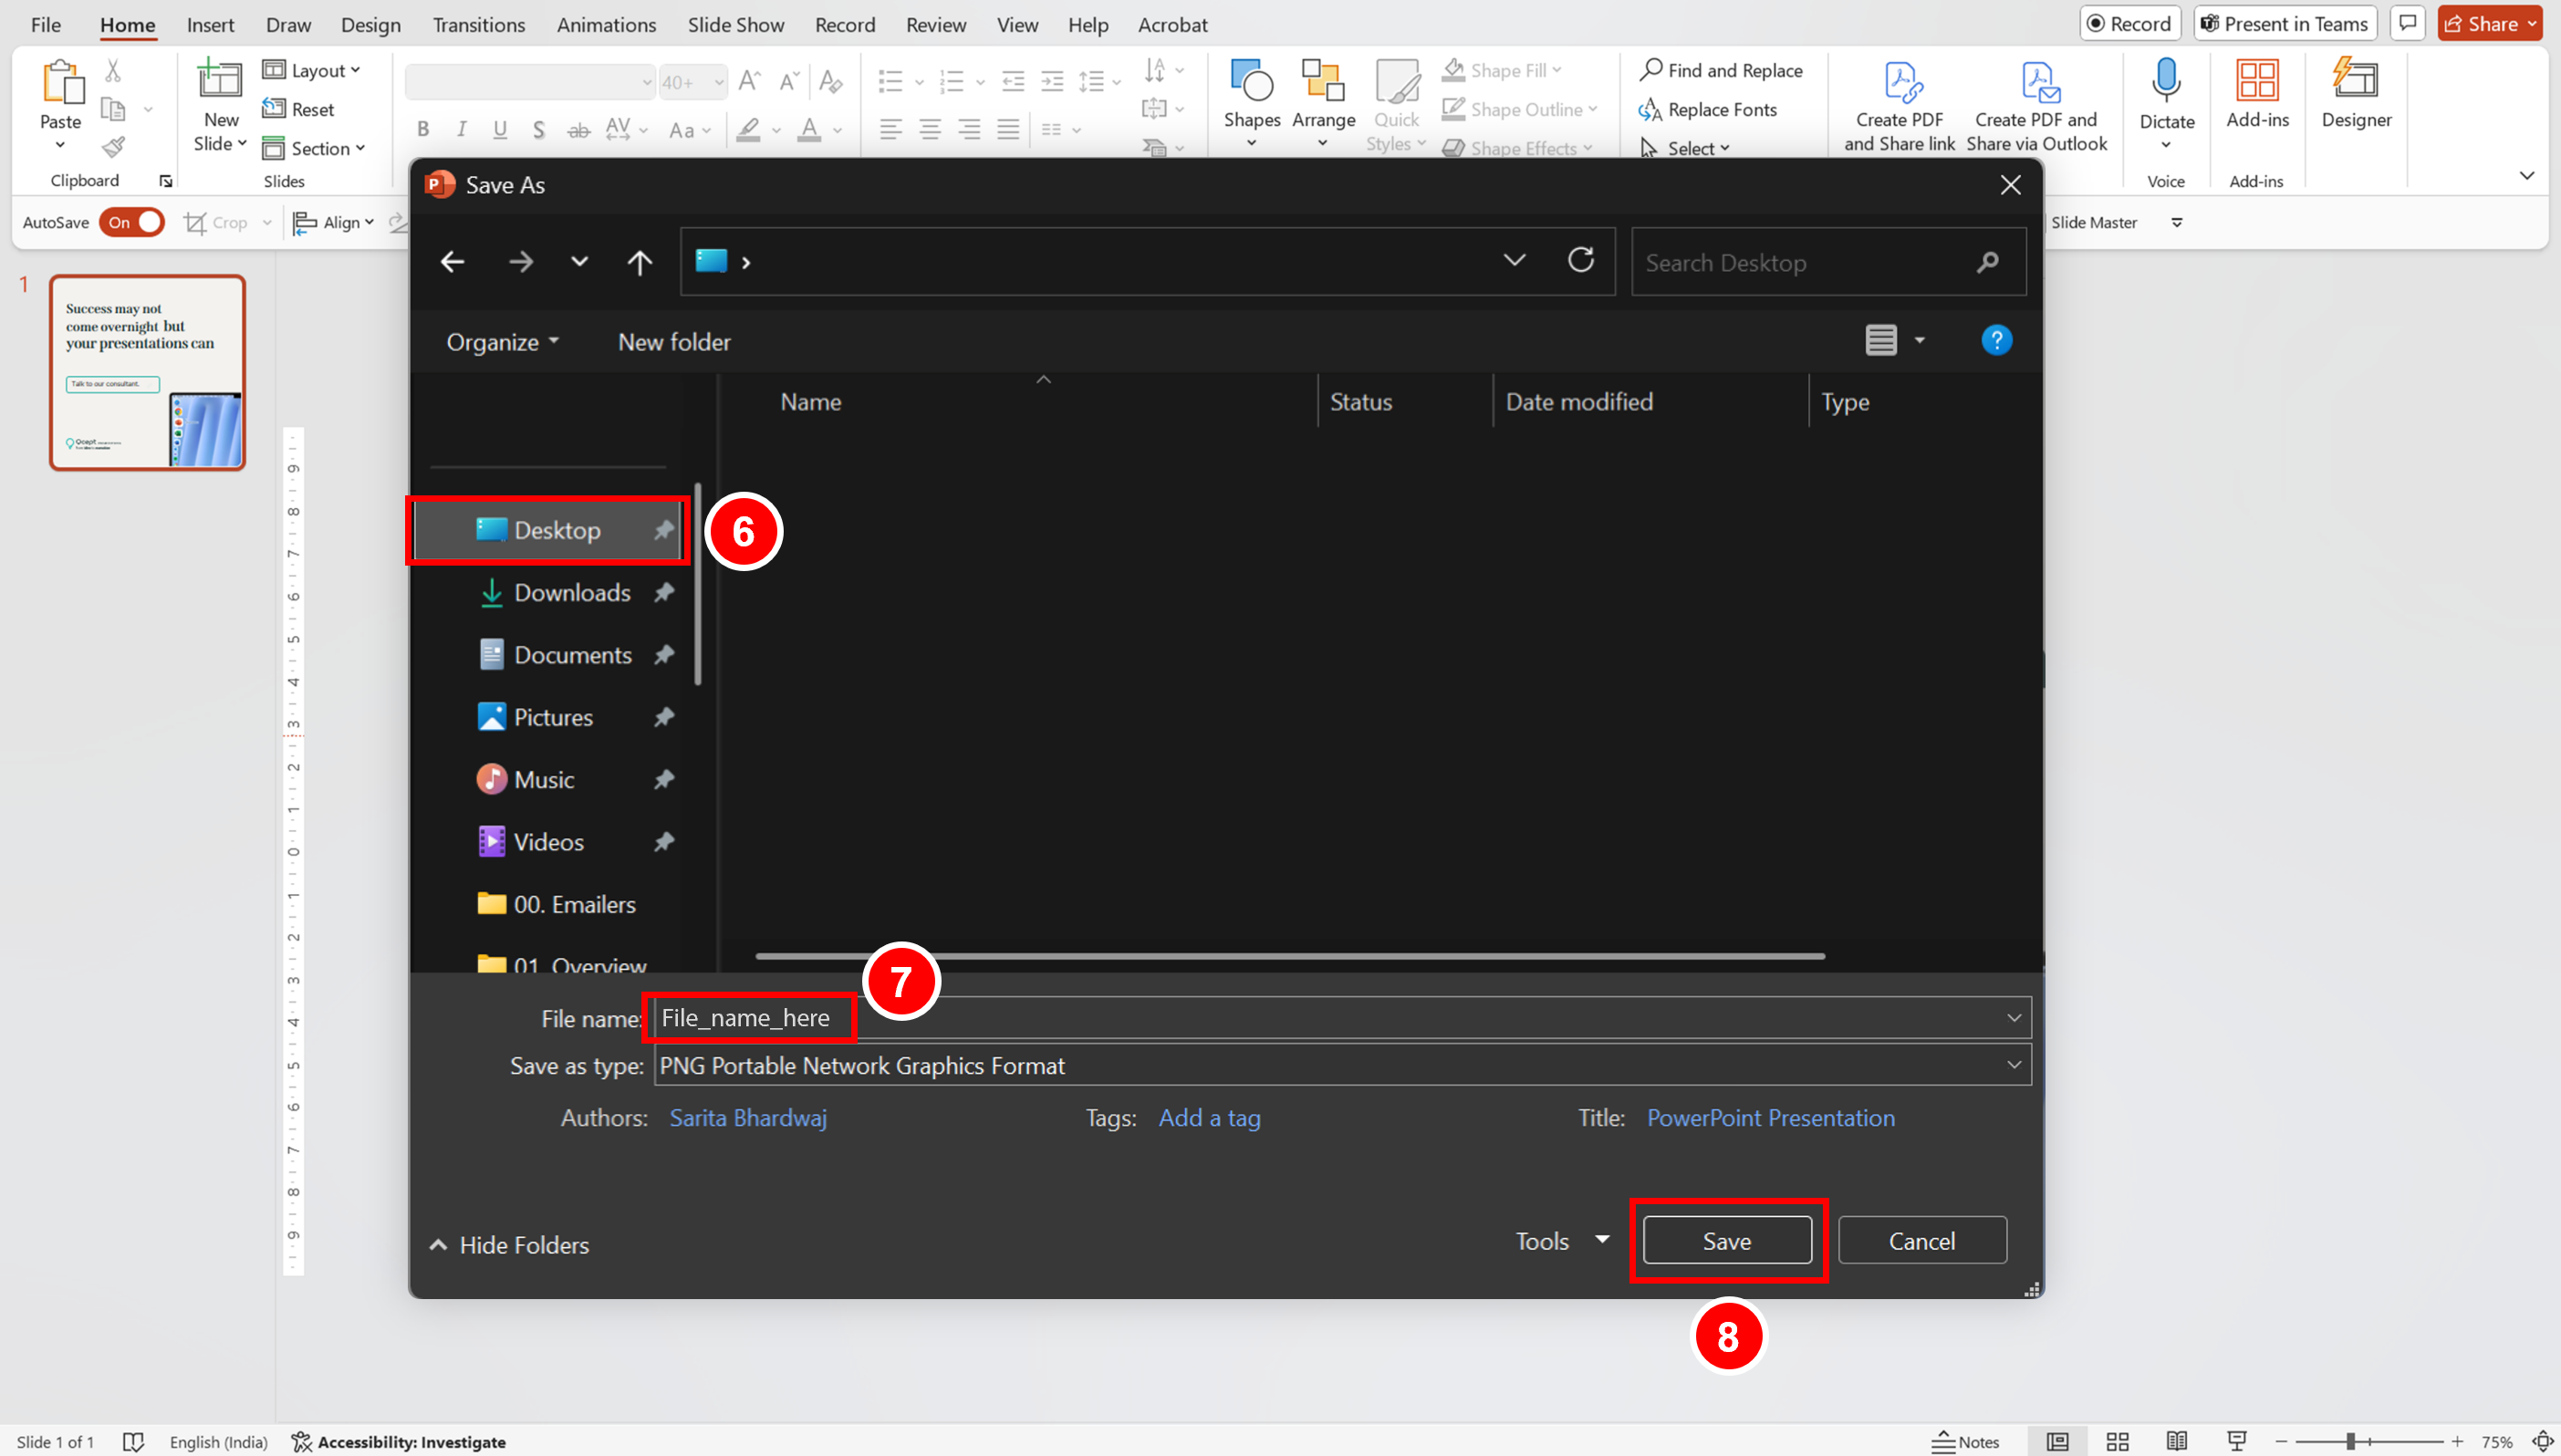
6. Select the location where you want to save (e.g., Desktop).
7. Enter the file name.
8. Click Save.
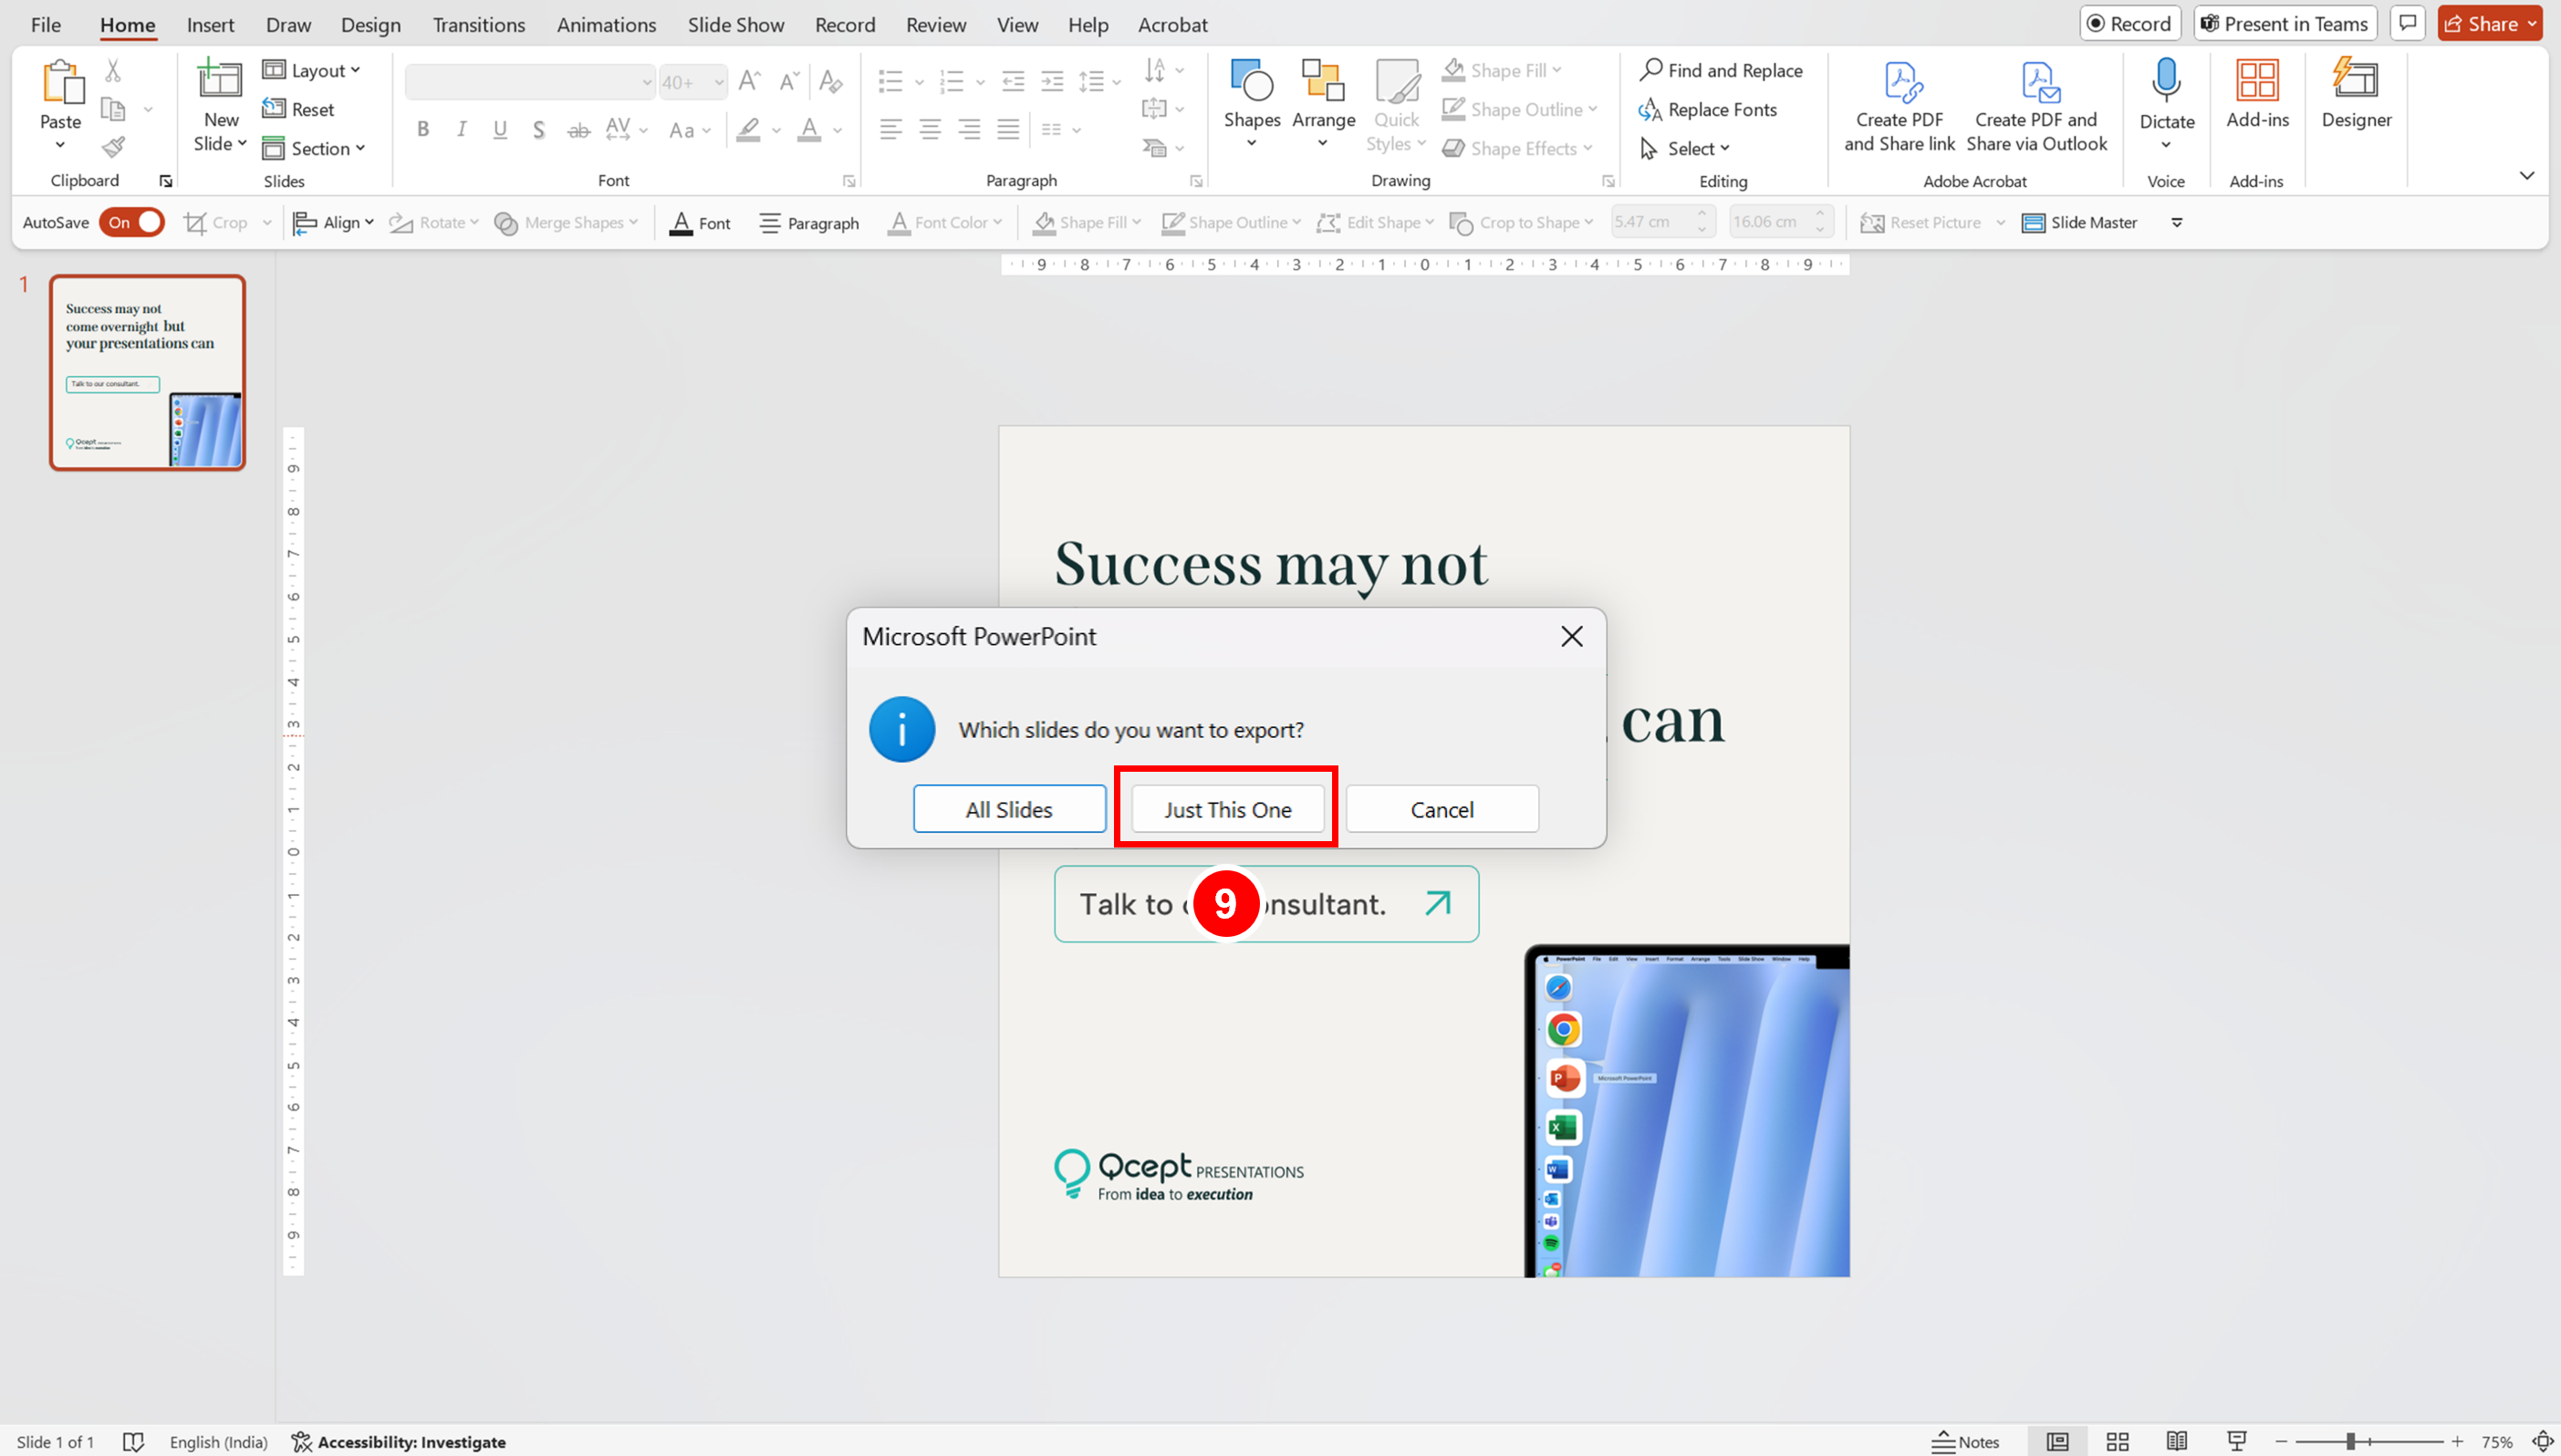
9. In the prompt, choose either:
All Slides → saves all slides as images.
Just This One → saves only the selected slide.
Your selected slide(s) will now be saved as images in the folder you chose.
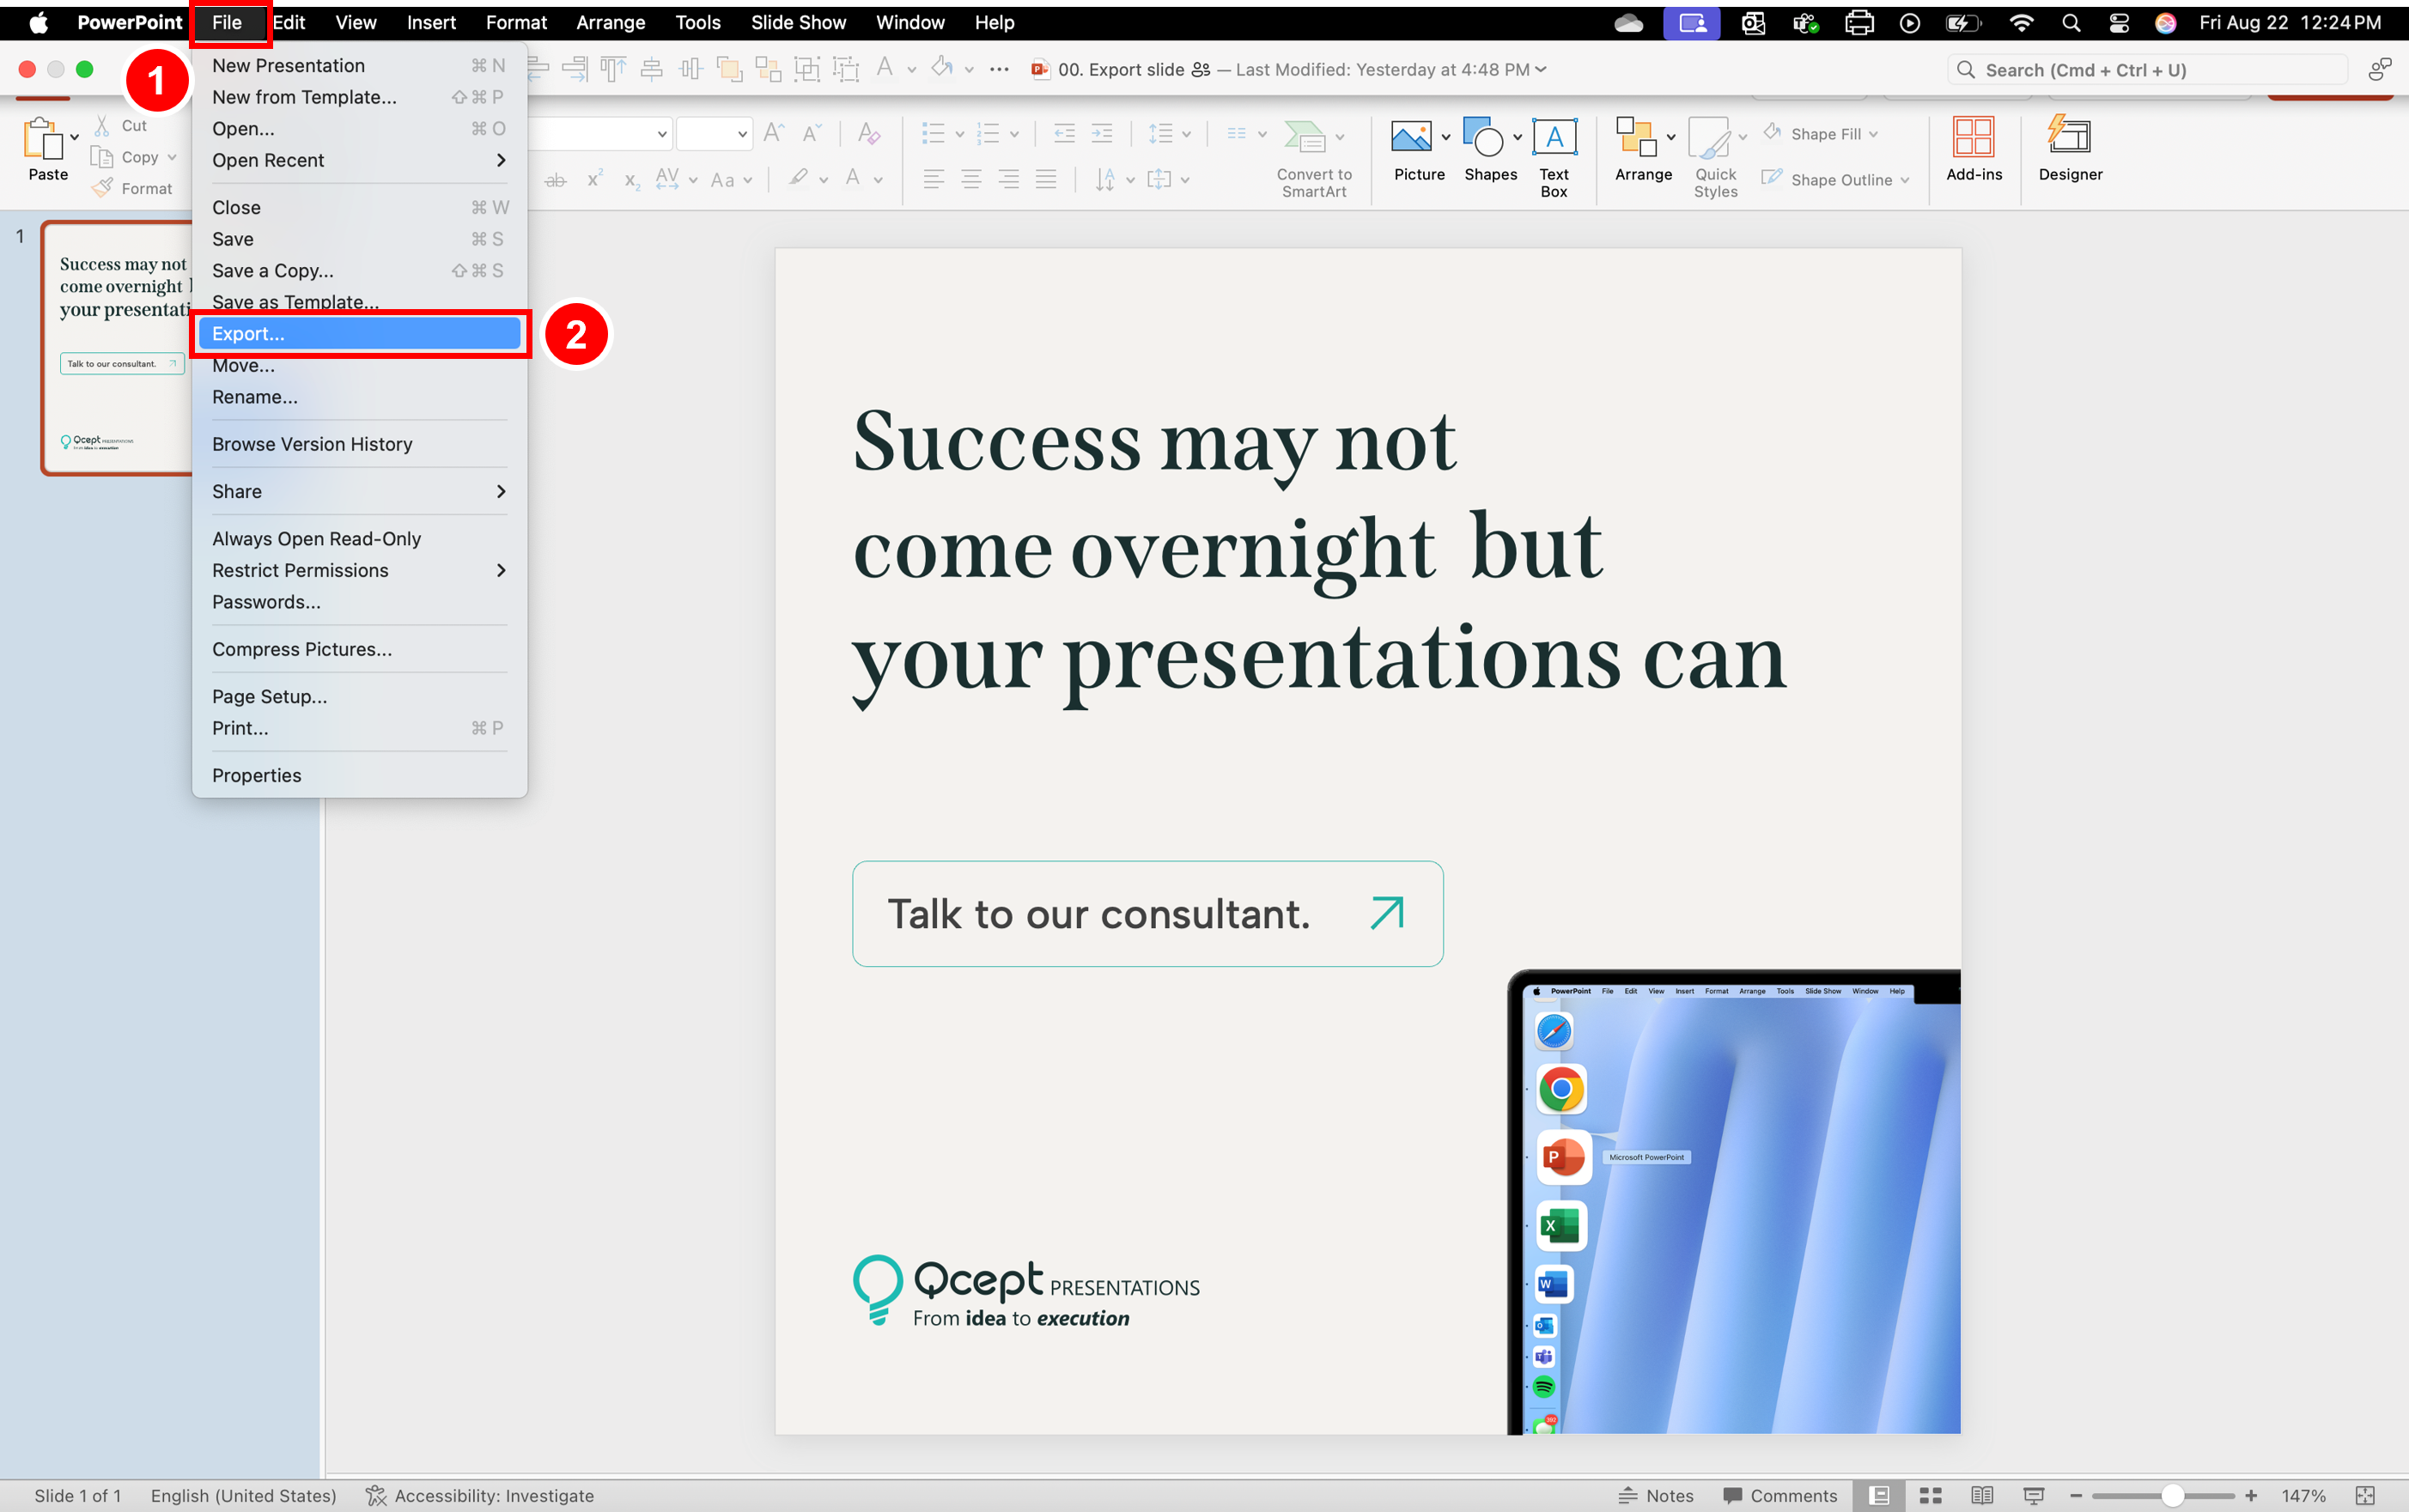
- Go to the File menu in PowerPoint.
- Select Export… from the dropdown.
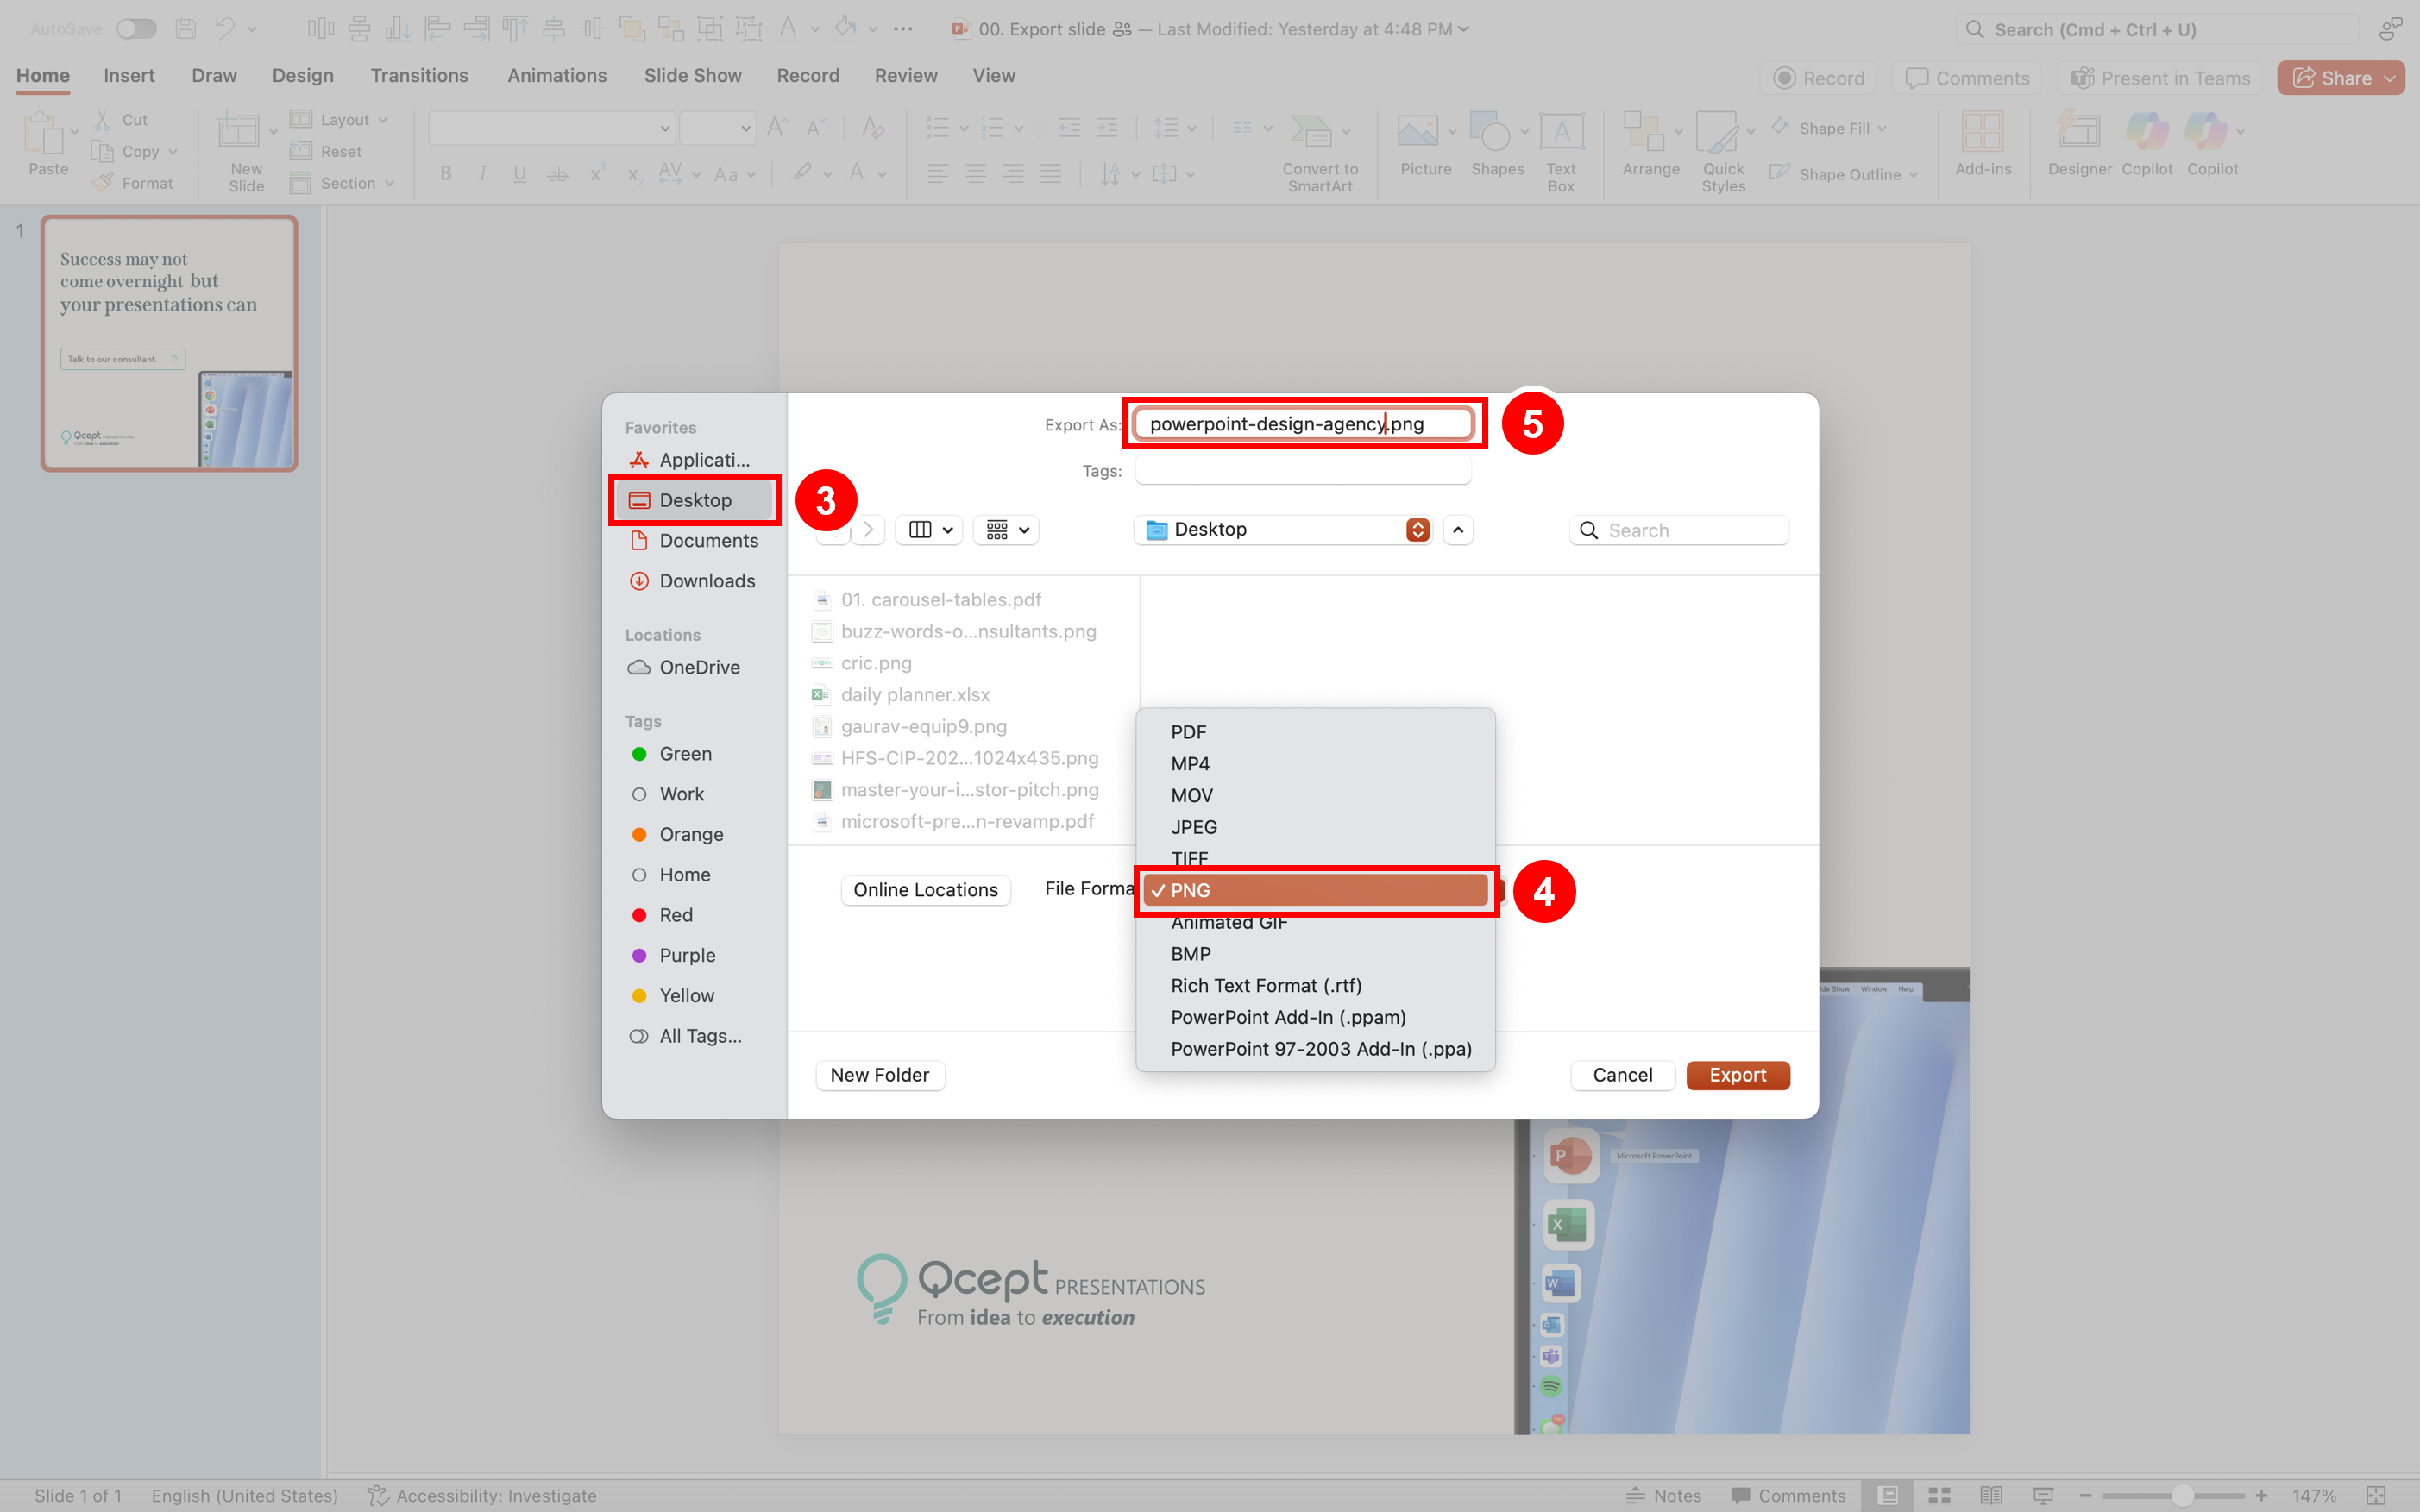
3. Choose the location where you want to save (e.g., Desktop).
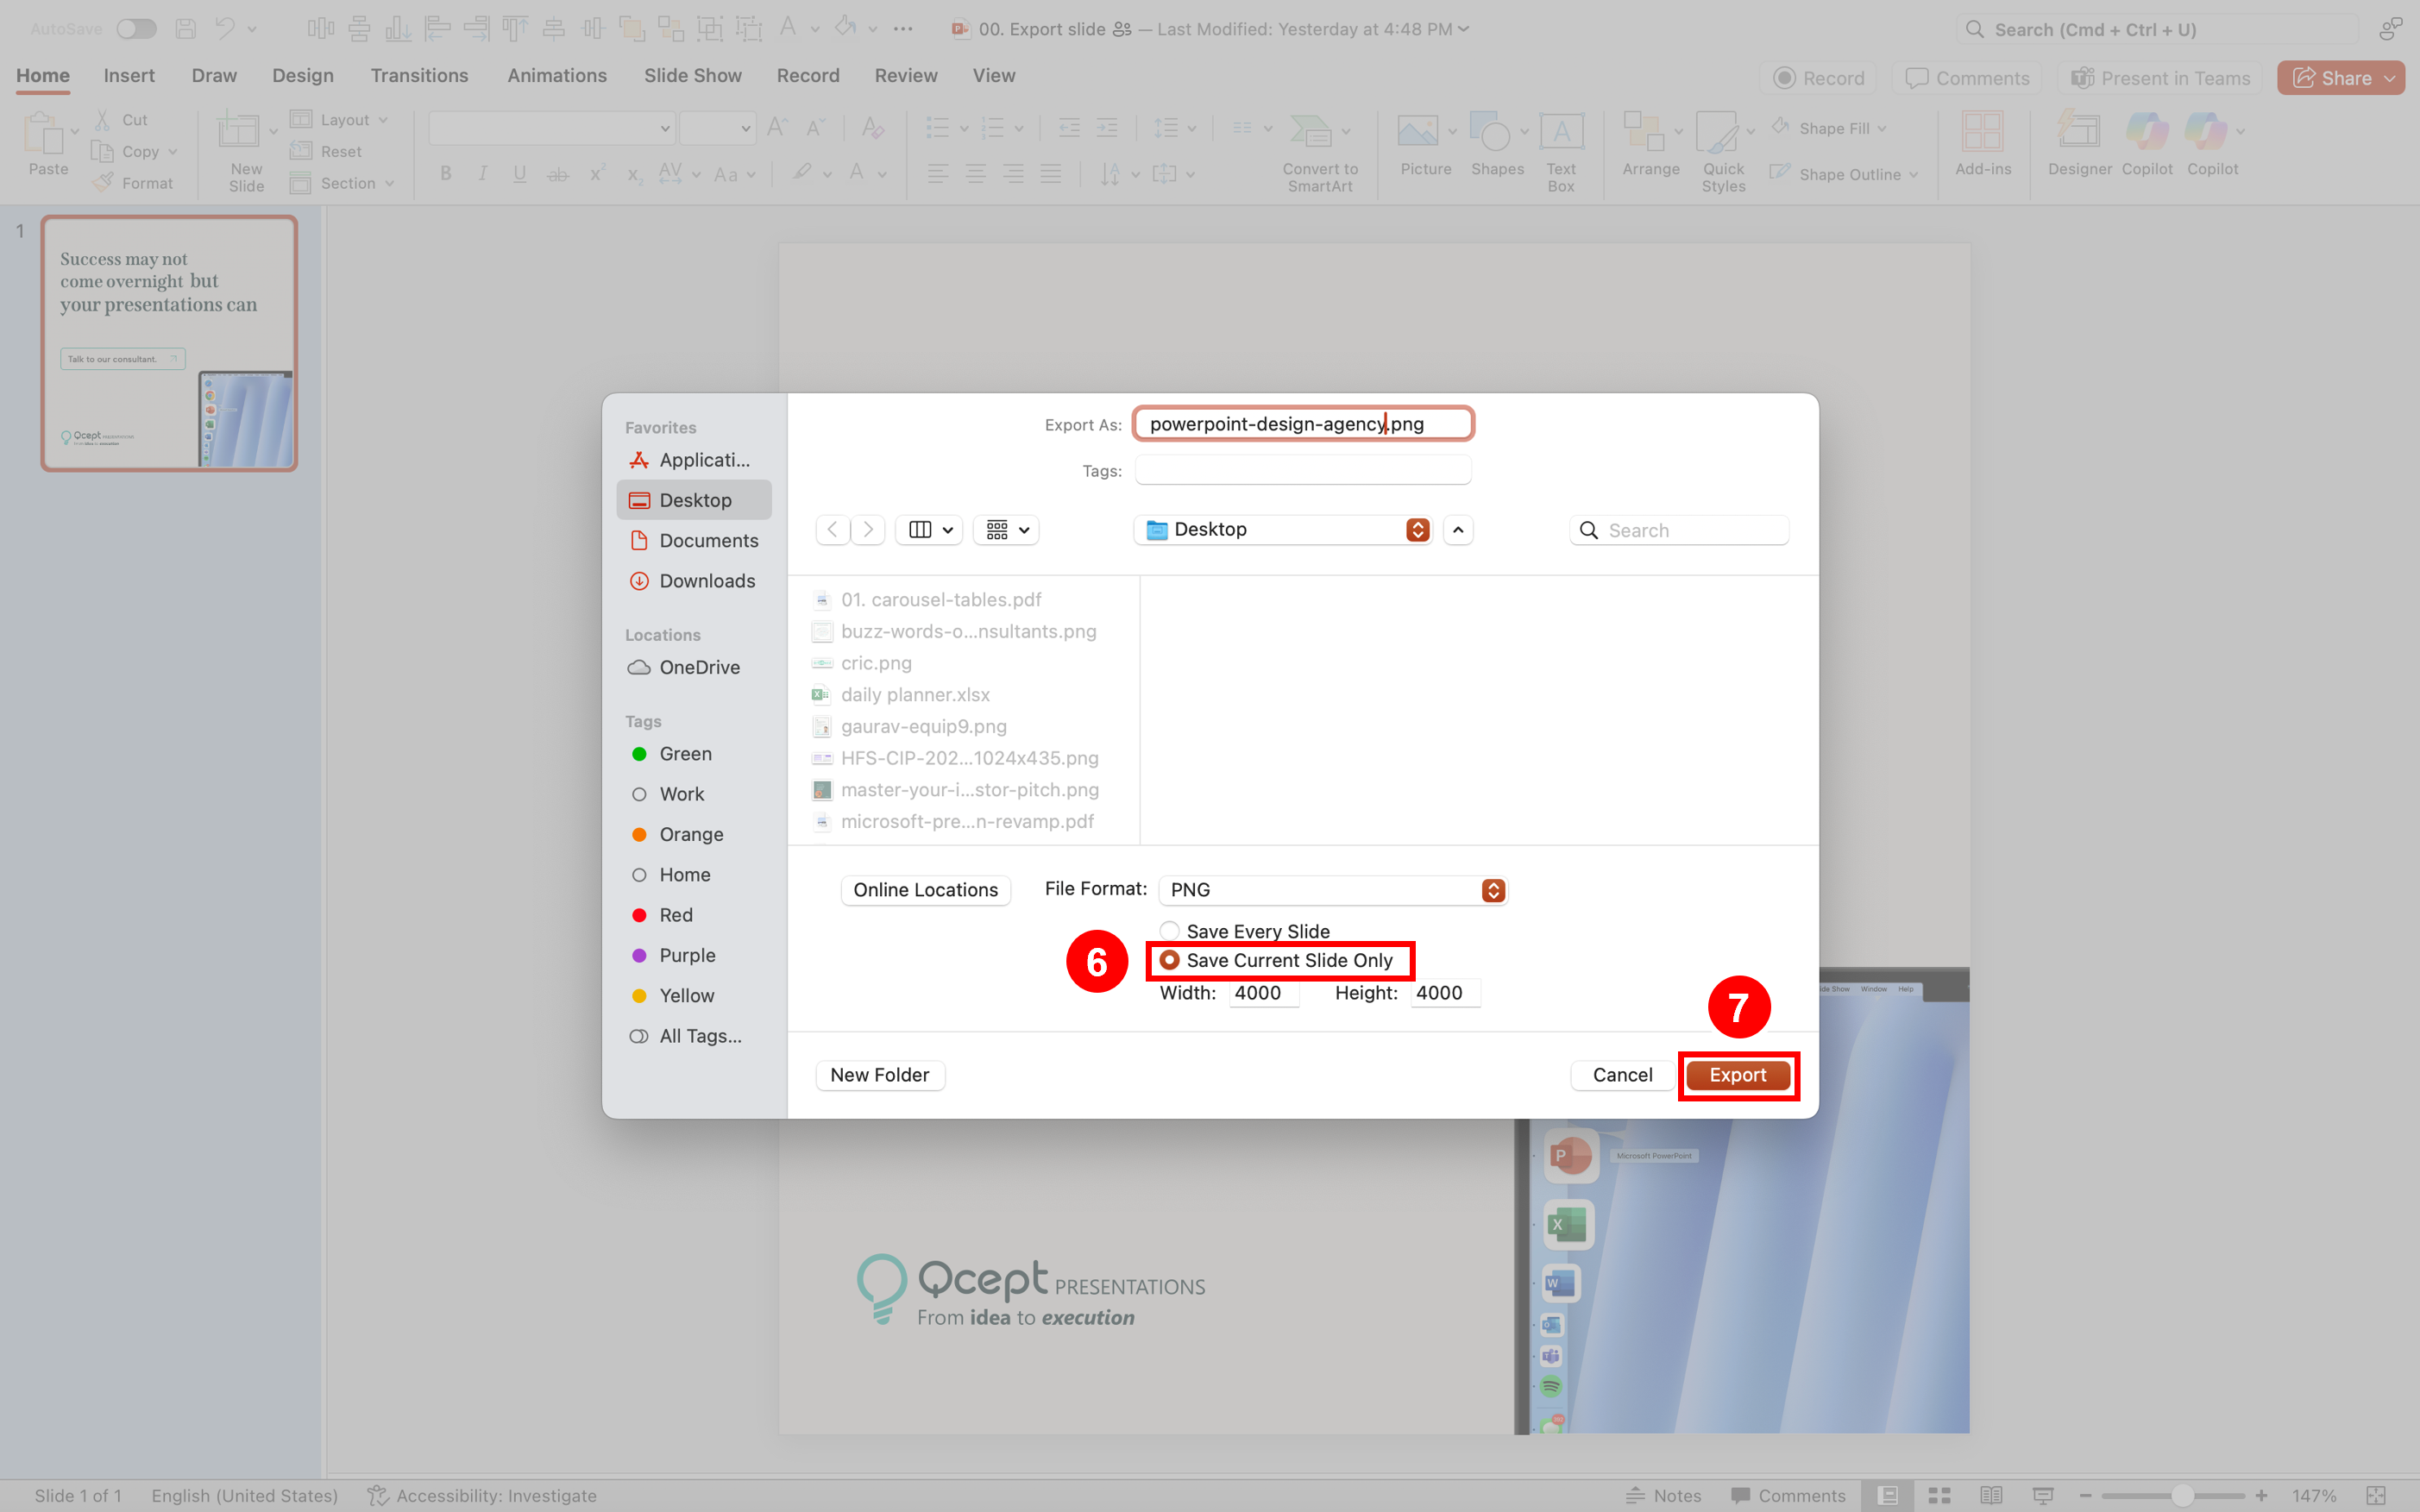
4. Choose the File Format as PNG.
5. In the pop-up window, type the file name (e.g., powerpoint-design-agency).
6. Select Save Current Slide Only (to export just the slide you need).
7. Click Export.
In Mac increasing dimensions (e.g., 4000×4000) gives you better image quality.
Scenario 2. Export a Specific Object or Graphic

- Select the object/element you want to export.
- Right-click on it → choose Save as Picture….
- In the Save As window, select the location (e.g., Desktop).
- Choose the file format (e.g., PNG, JPEG).
- Enter a file name.
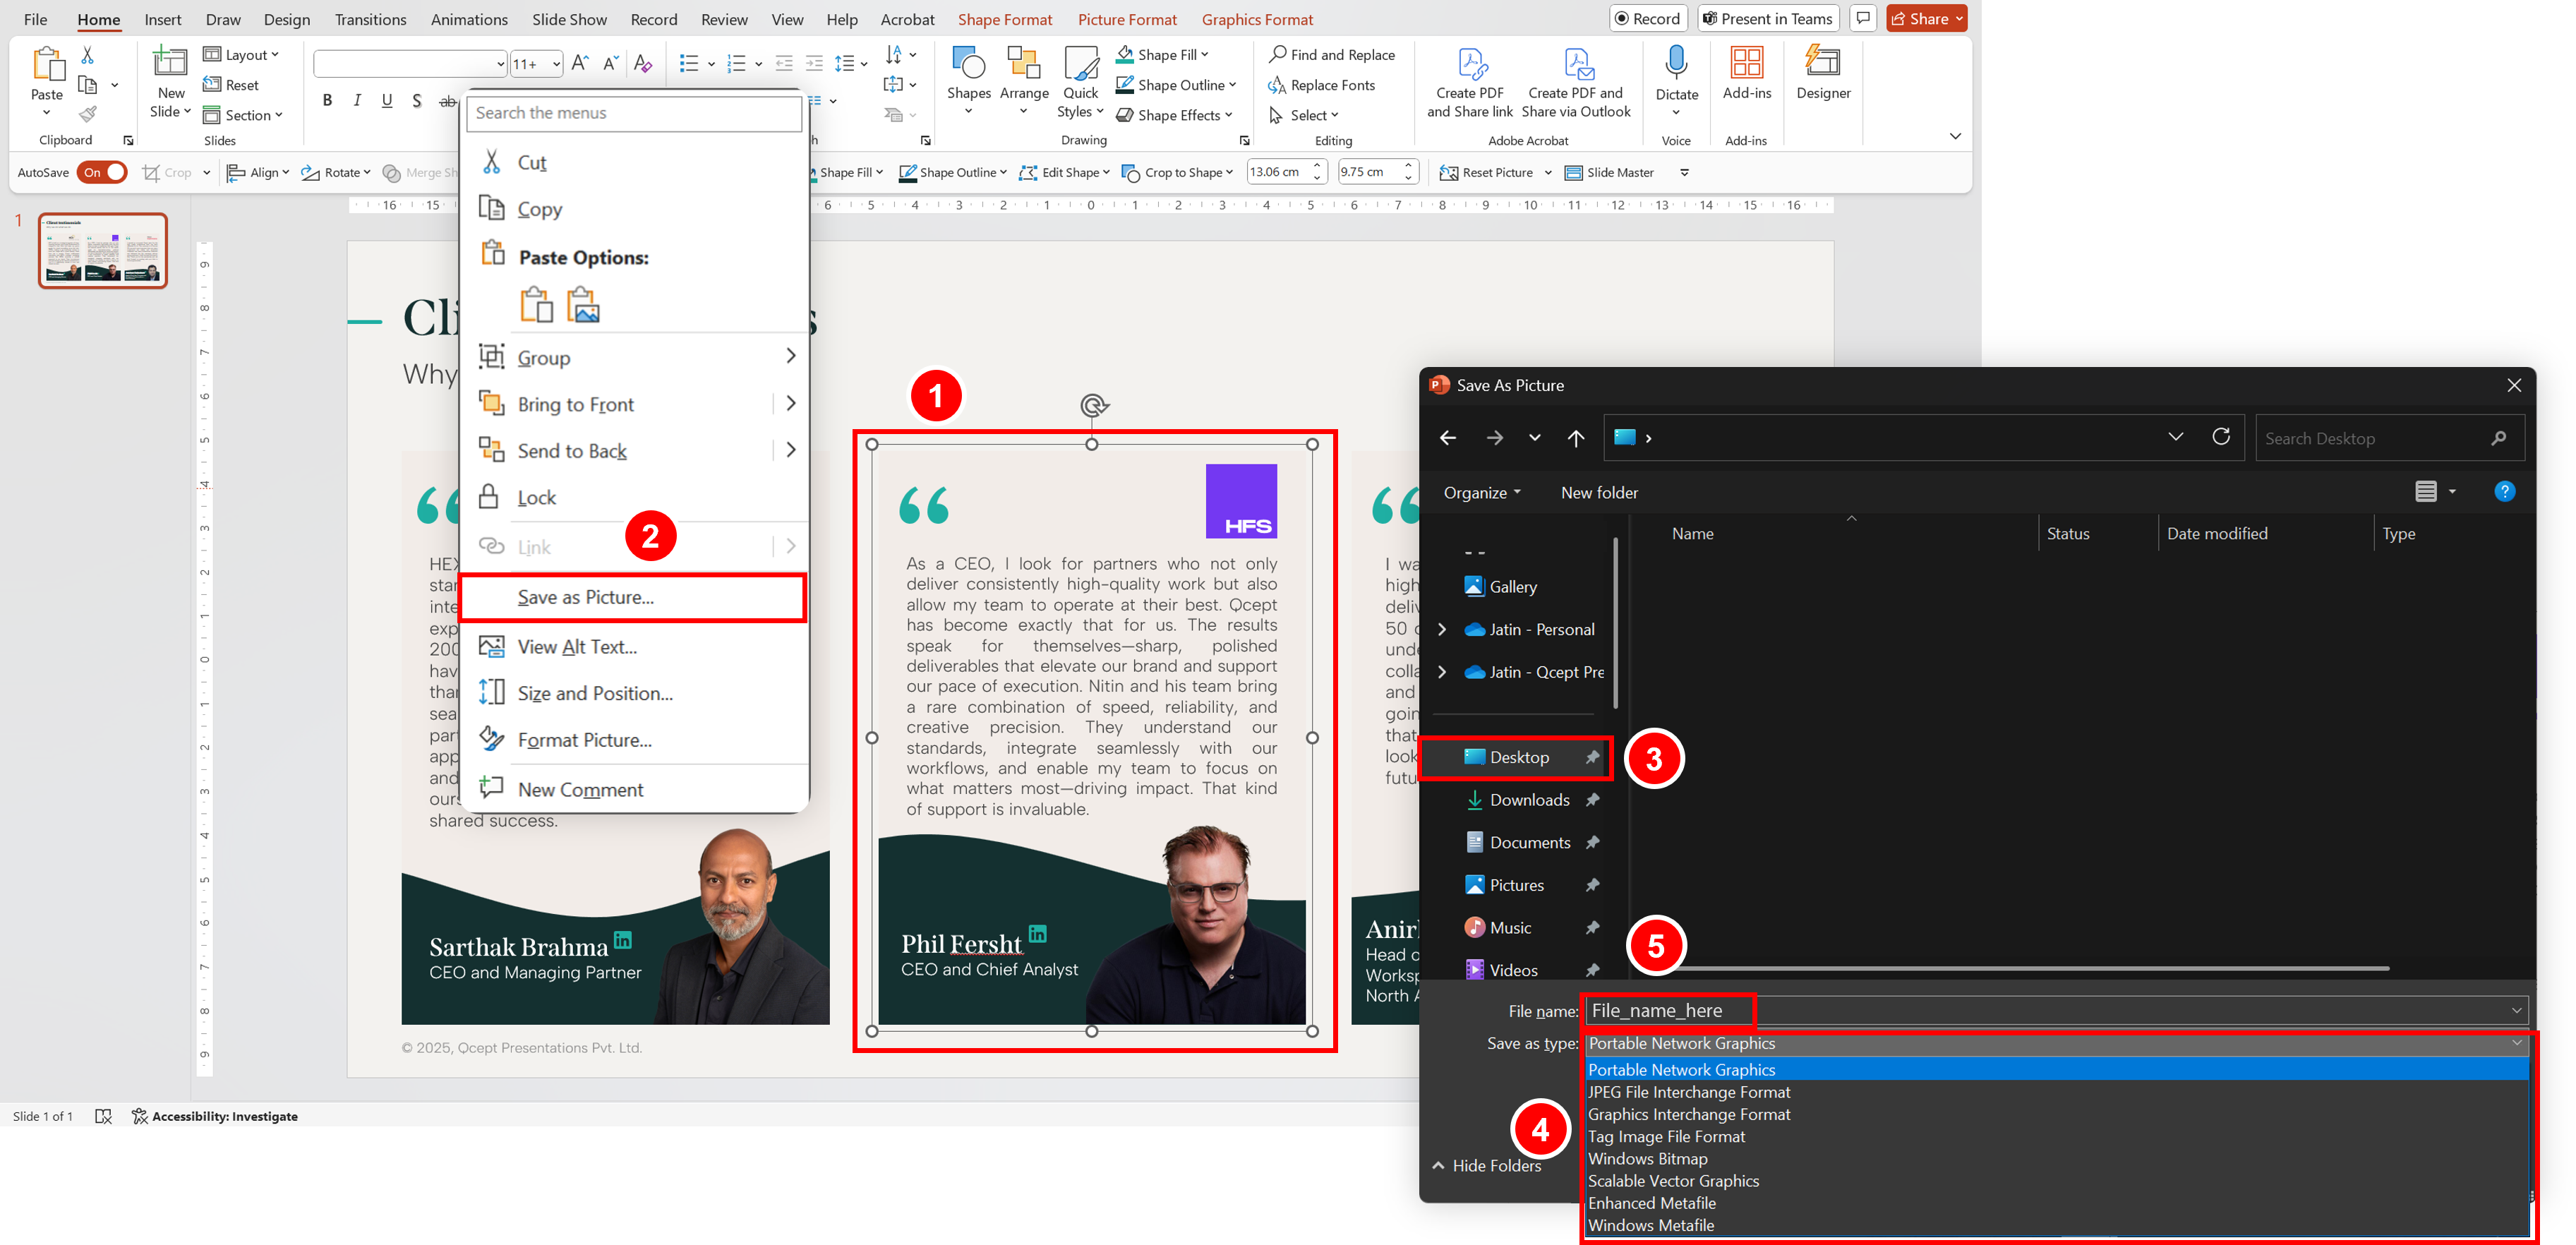
6. Click Save.
Need transparency and high quality? Always go with PNG.
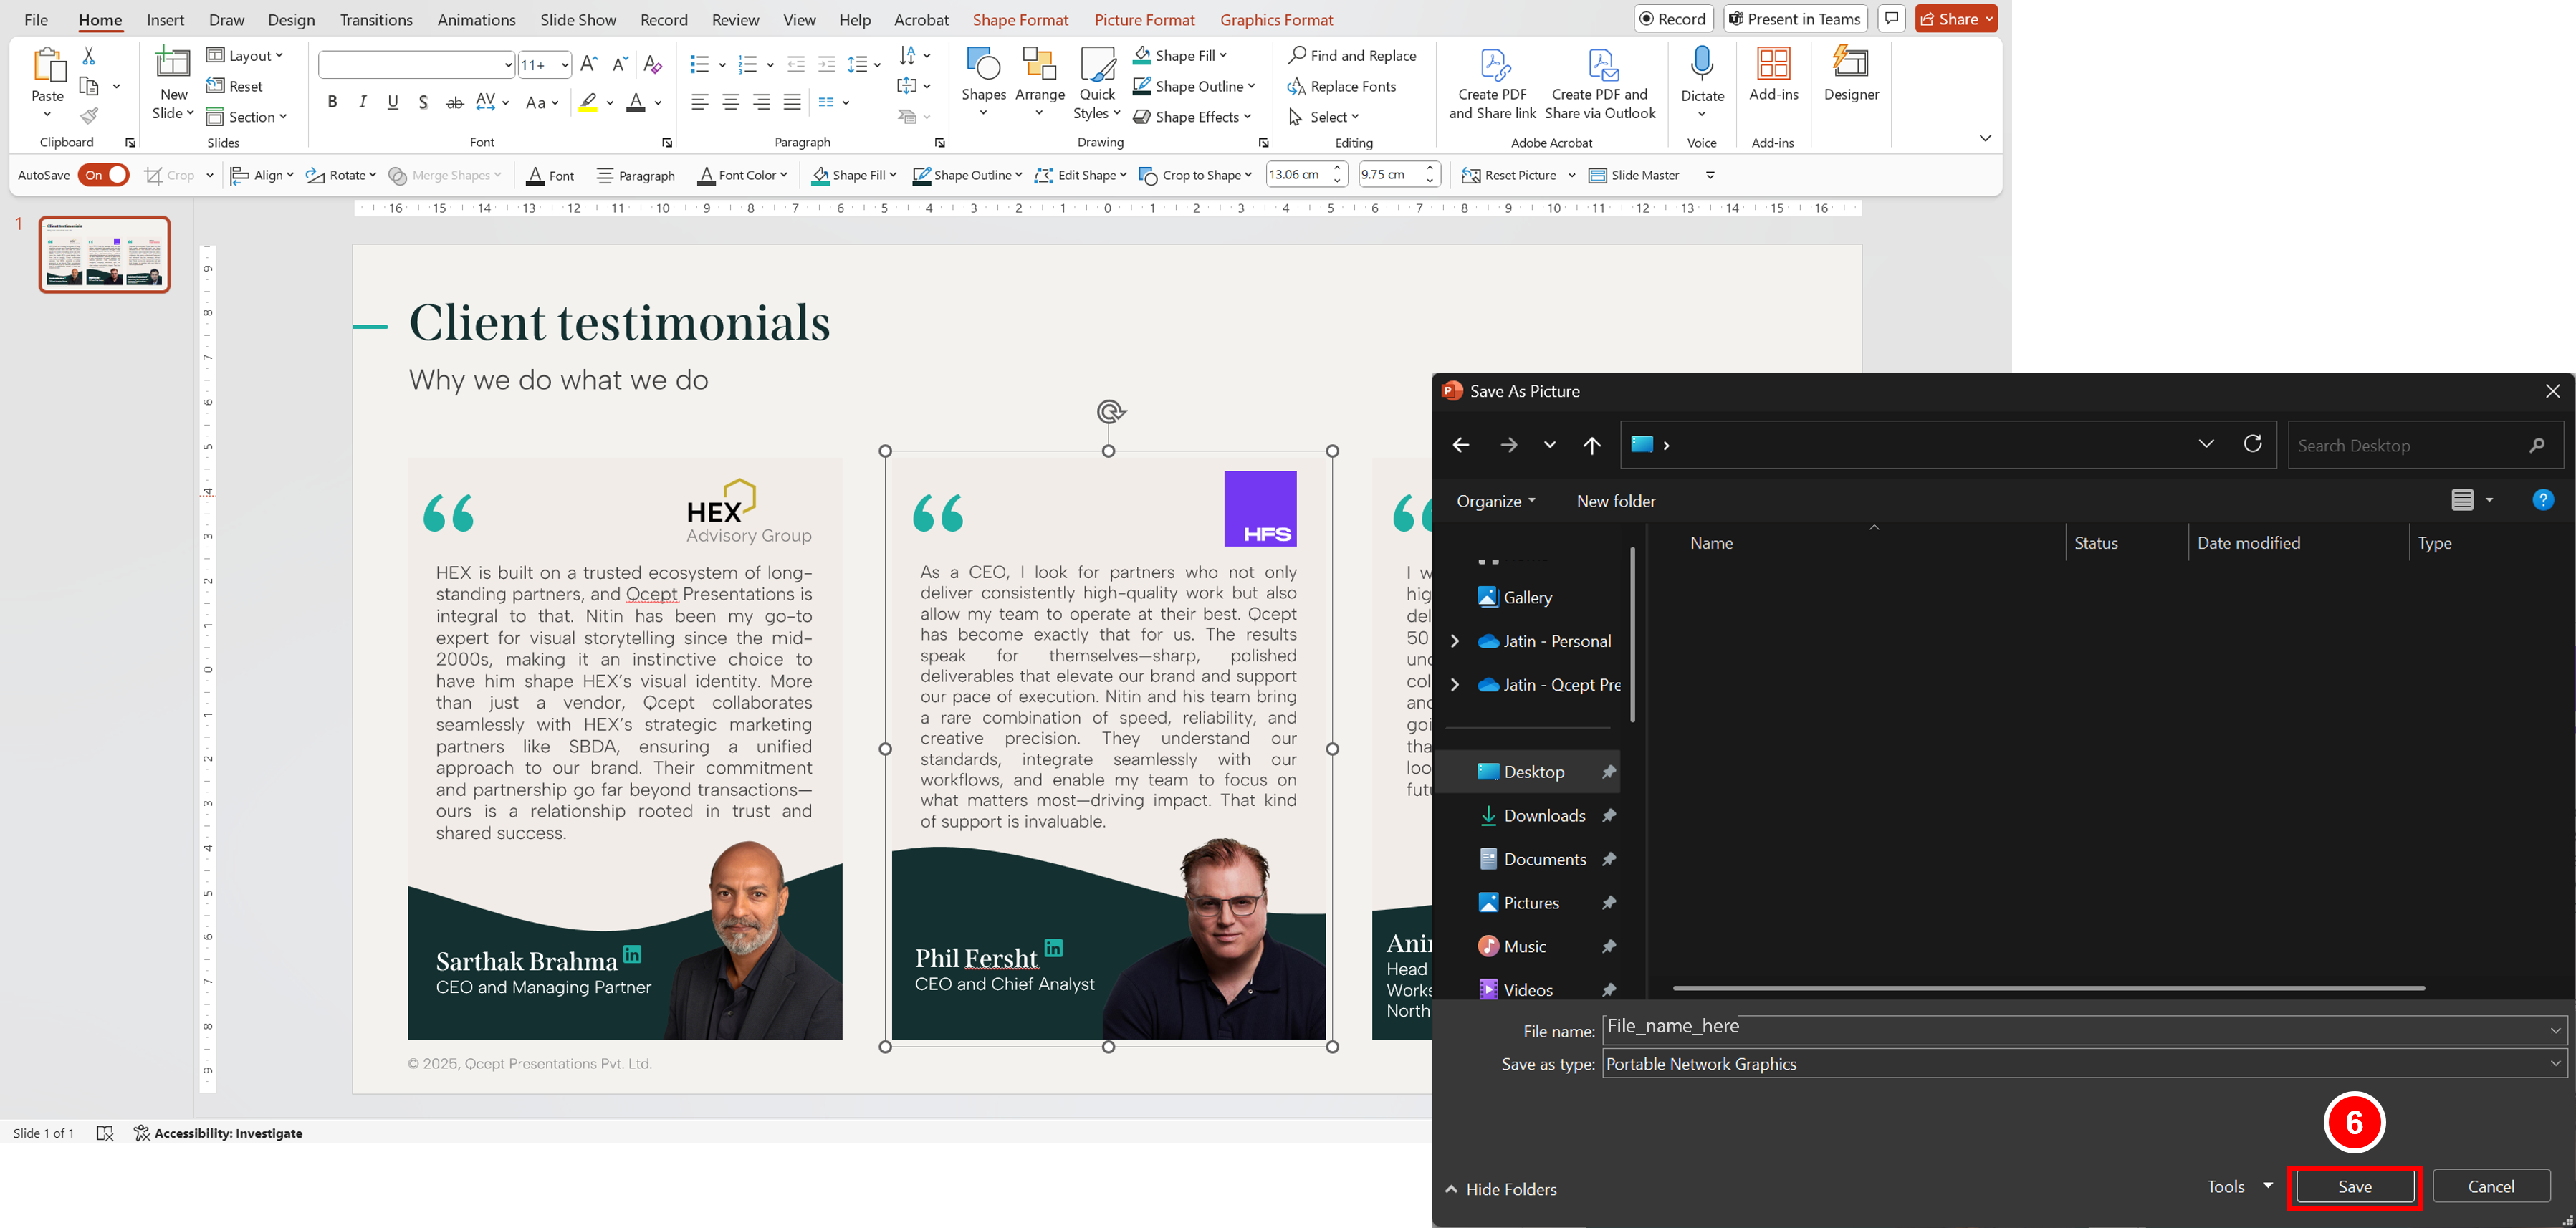
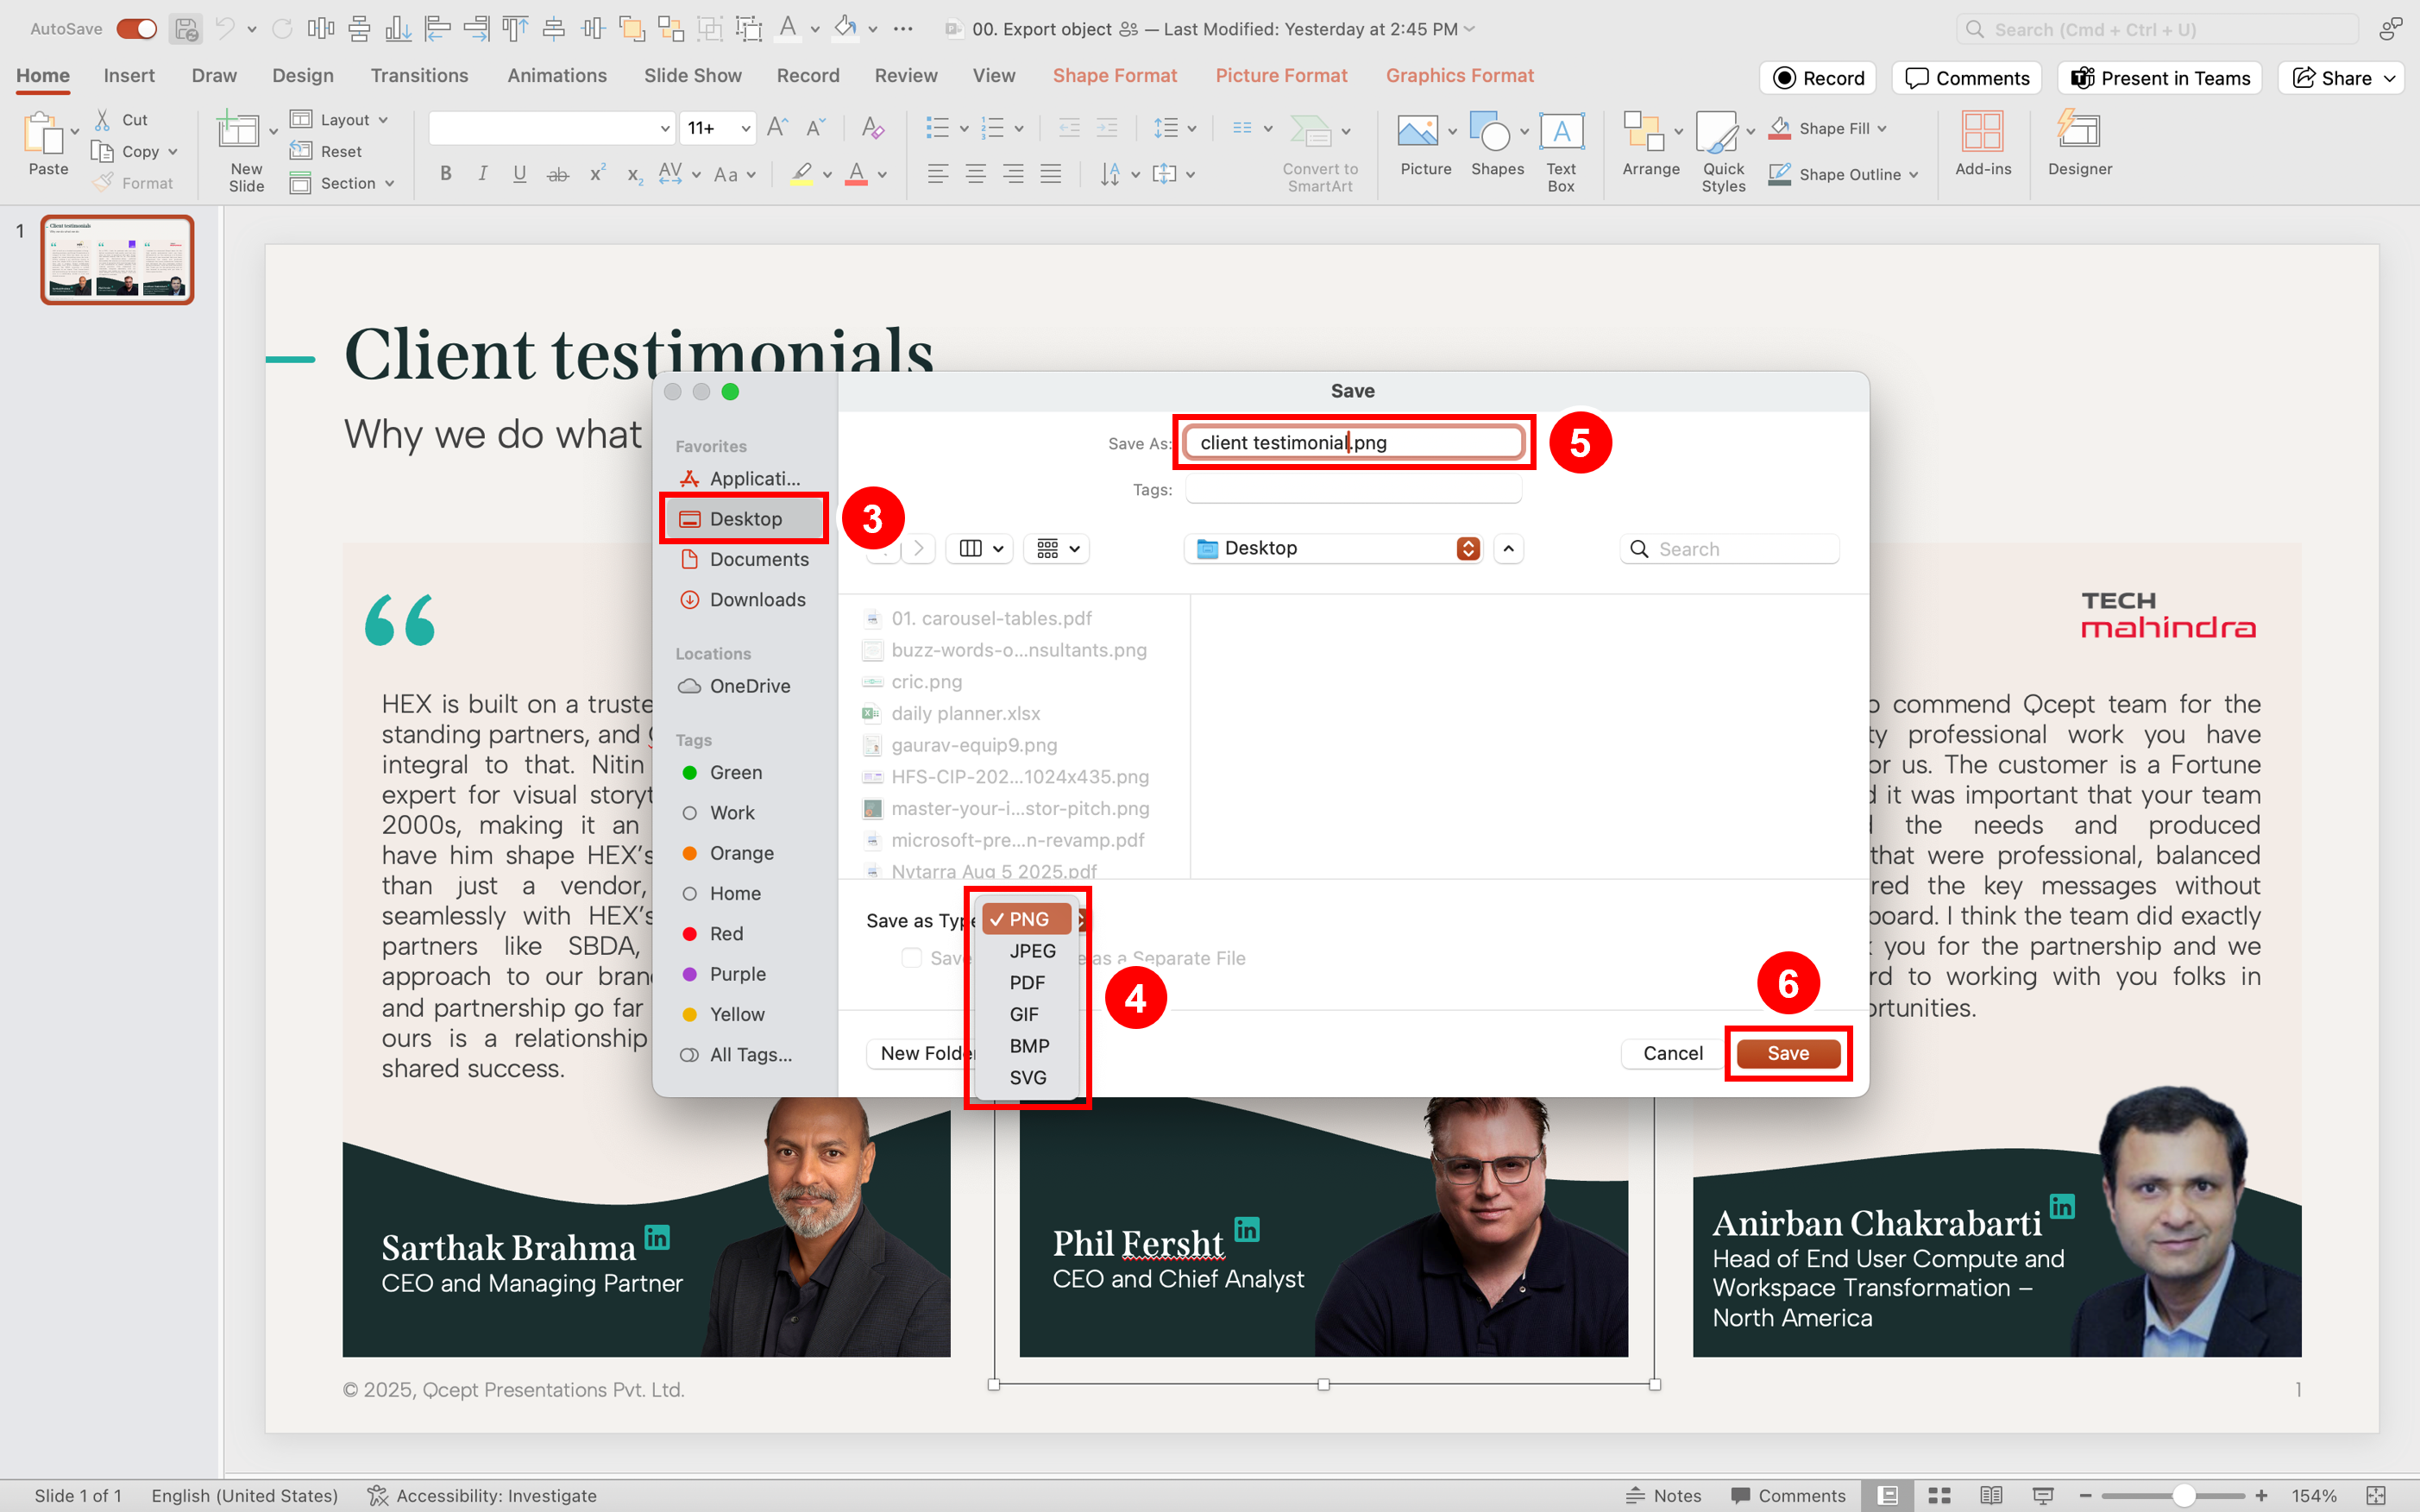
- Right-click on the object you want to save.
- Select Save as Picture… from the menu.
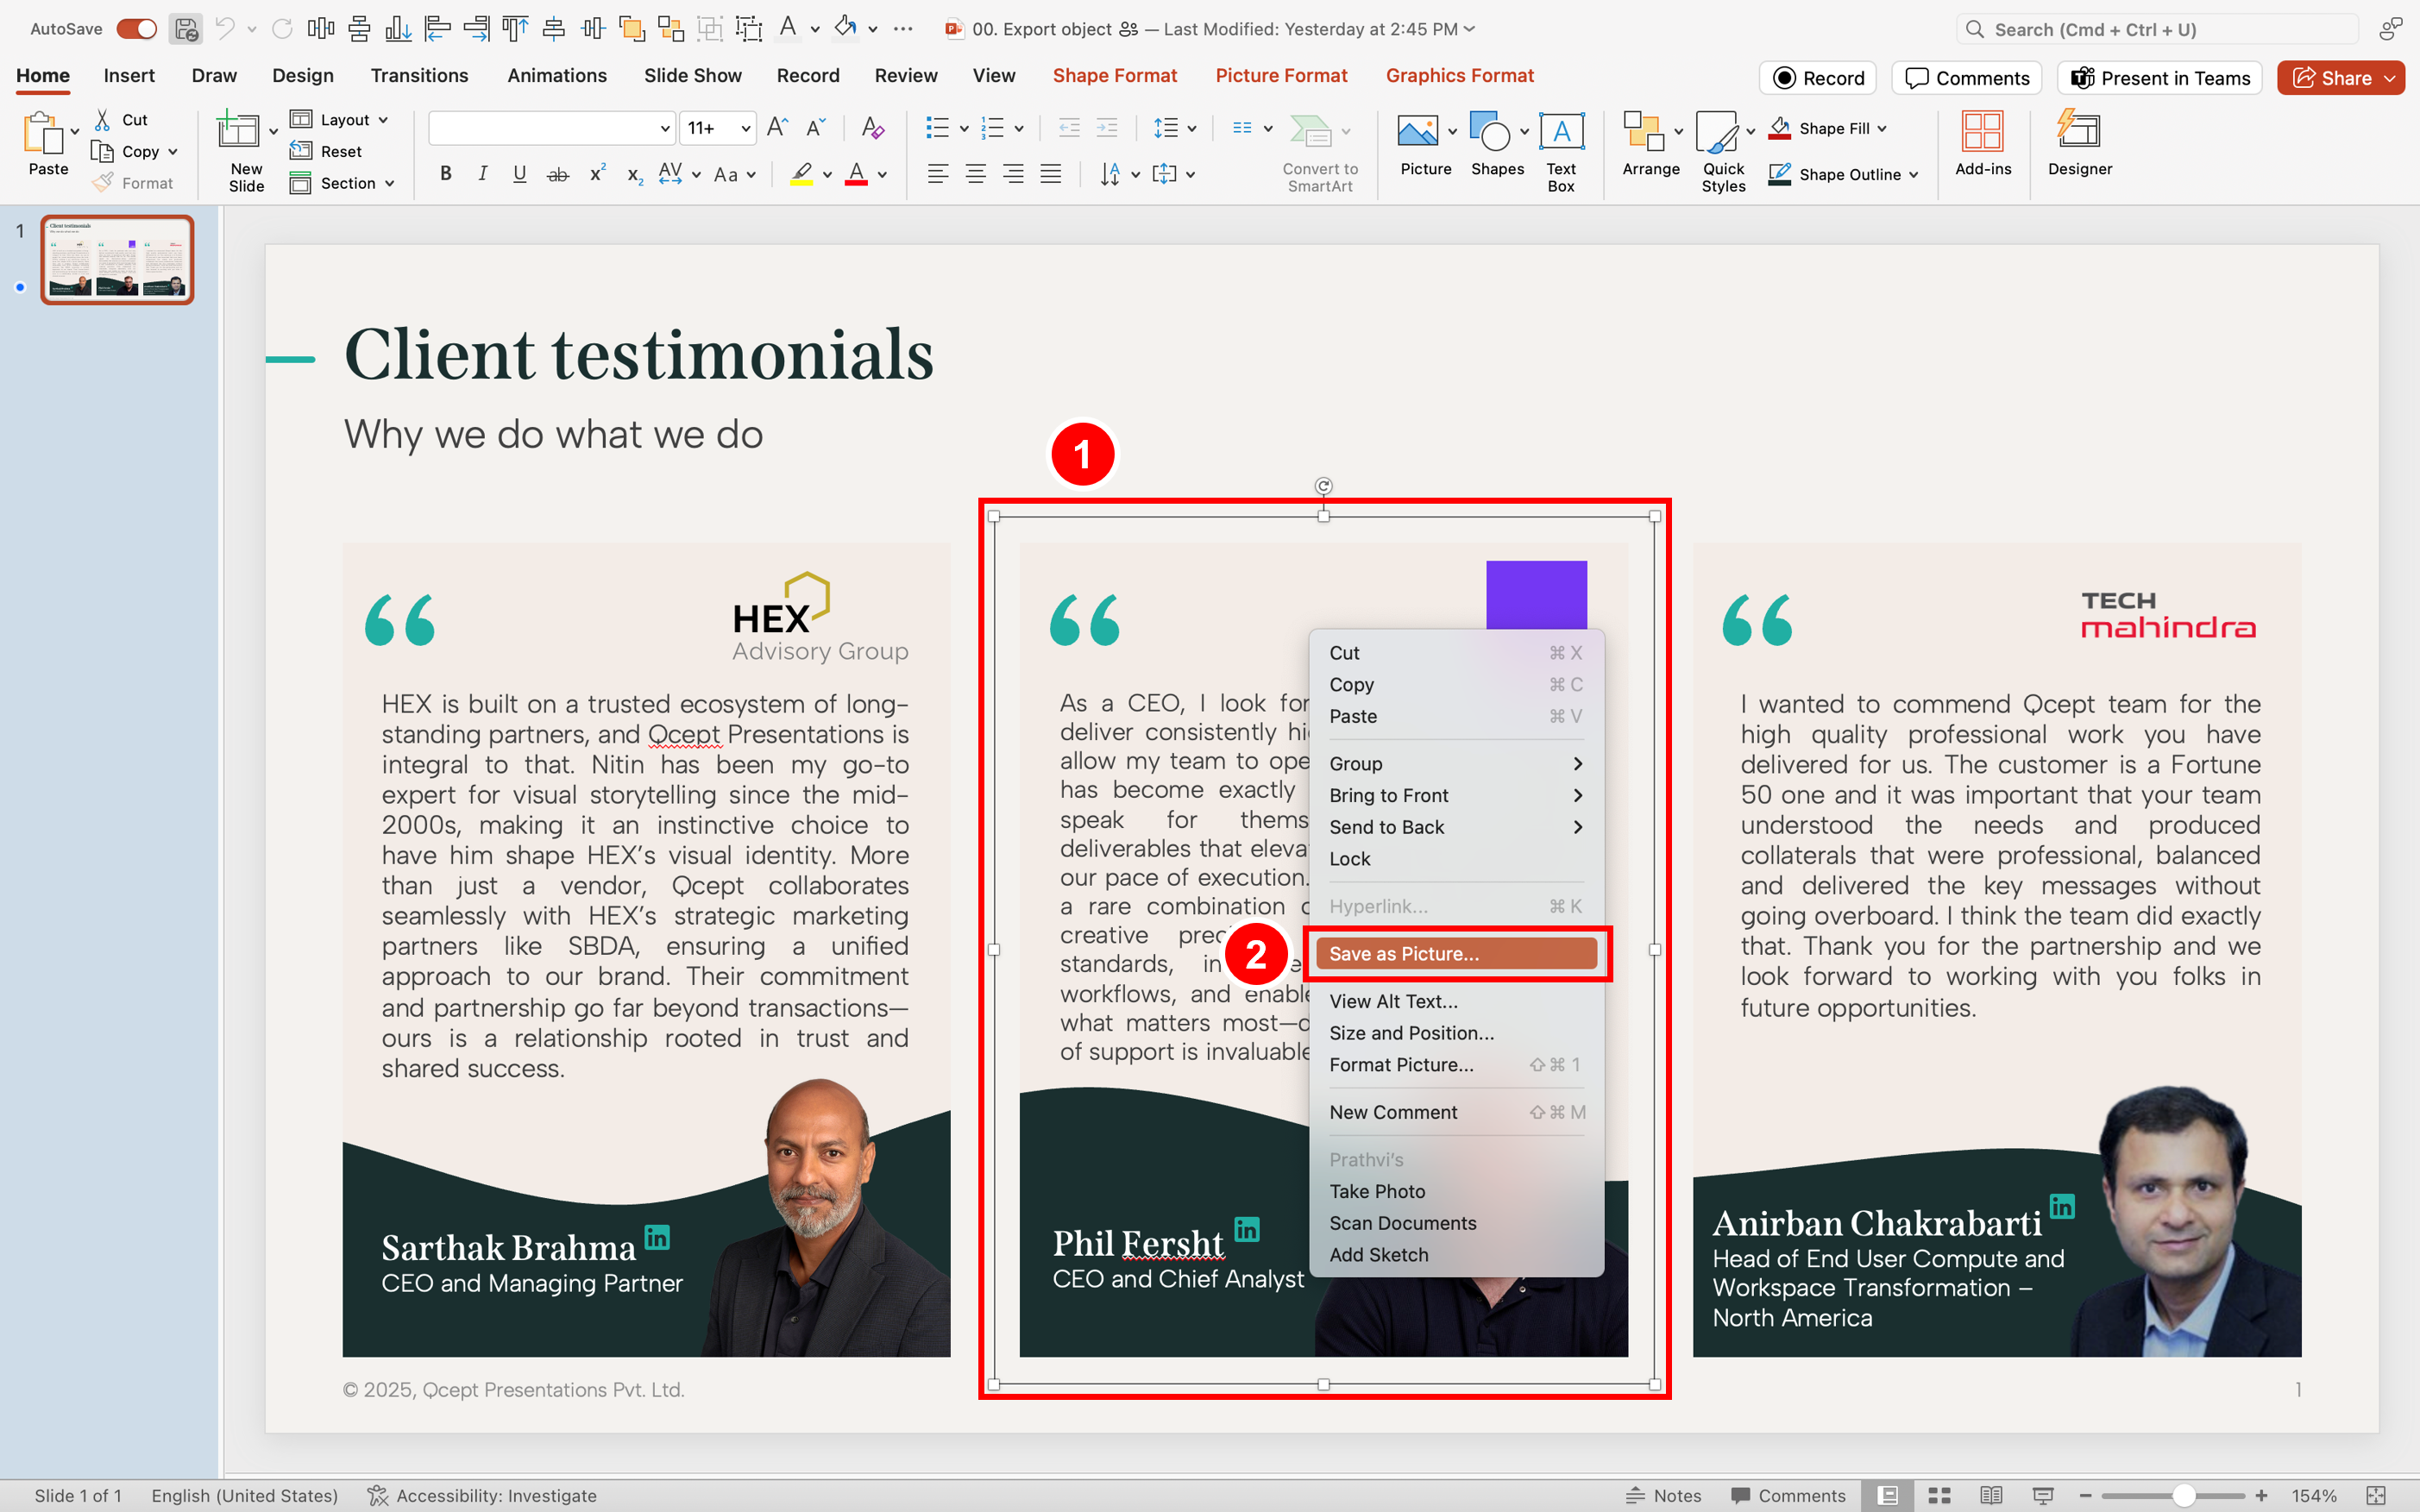
3. Choose the location where you want to save (e.g., Desktop).
4. From Save as Type, choose your preferred format (PNG, JPEG, PDF, GIF, BMP, or SVG).
5. Enter a file name (e.g., client testimonial.png).
6. Click Save.
PNG is ideal if you want a transparent background.
The conclusion
Exporting from PowerPoint doesn’t need to be a puzzle.
Whether you’re working on a proposal, a LinkedIn post, or a last-minute deck fix, knowing how to export high-quality images can save the day.
So next time someone says,
“Hey, can you send that graphic as a PNG?”
You won’t need your designer’s help.
You’ll already be done.
You may also like
We use storytelling and design to build high impact presentations for leading brands
PowerPoint design
services and outsourcing
Enterprises, analysts, consultants
Investor pitches
and fundraising narrative
Founders, fund managers
Sales presentations, proposals, and collaterals
Sales & marketing teams
PowerPoint template and visual slide bank
Enterprises, advisory & research firms
CXO presentations
and thought leadership
IT-BPO services & consulting firms
Financial, ESG,
and annual reports
Financial services, large enterprises
Training – PowerPoint design and visualization
Sales team, analysts, consultants
Conference and event presentations
Keynote speakers, event managers

