How to create placeholders in PowerPoint (the right way)
June 25, 2026 | 5 min read

This guide is for consultants and analysts who build decks regularly and need images to sit cleanly inside shapes without manual resizing every time a file changes hands.
You have been there. The deck is due in two hours. The sales team has dropped a photo into a slide, it is the wrong size, it is spilling outside the shape, and now the whole layout looks like it was assembled in a hurry. Which, to be fair, it was.
You probably have defined shapes in your PowerPoint template if you have any, and that solves almost all ready-to-use slides for your most common content. But when you are building something outside those defaults, you need to know how to set it up yourself.
Here is the thing though. That problem is almost always a design decision made at the beginning of the build, not at the moment of panic. Consultants and analysts work with decks that go through ten rounds of revision, get handed off between three people, and need to look consistent every single time a new image drops in. That requires structure. That requires placeholders.
A placeholder, in this context, is a shape that holds your image inside a defined boundary. No overflow. No distortion. No one manually resizing a photo at midnight. The image sits clean inside the frame, the slide stays tight, and the deck looks like someone actually thought about it.
This is how you build one.
How to create placeholders in PowerPoint
Create the shape
Pick the shape that fits your layout. For this walkthrough, we are using a circle. It shows image containment issues most clearly, but the method works for any shape.
-
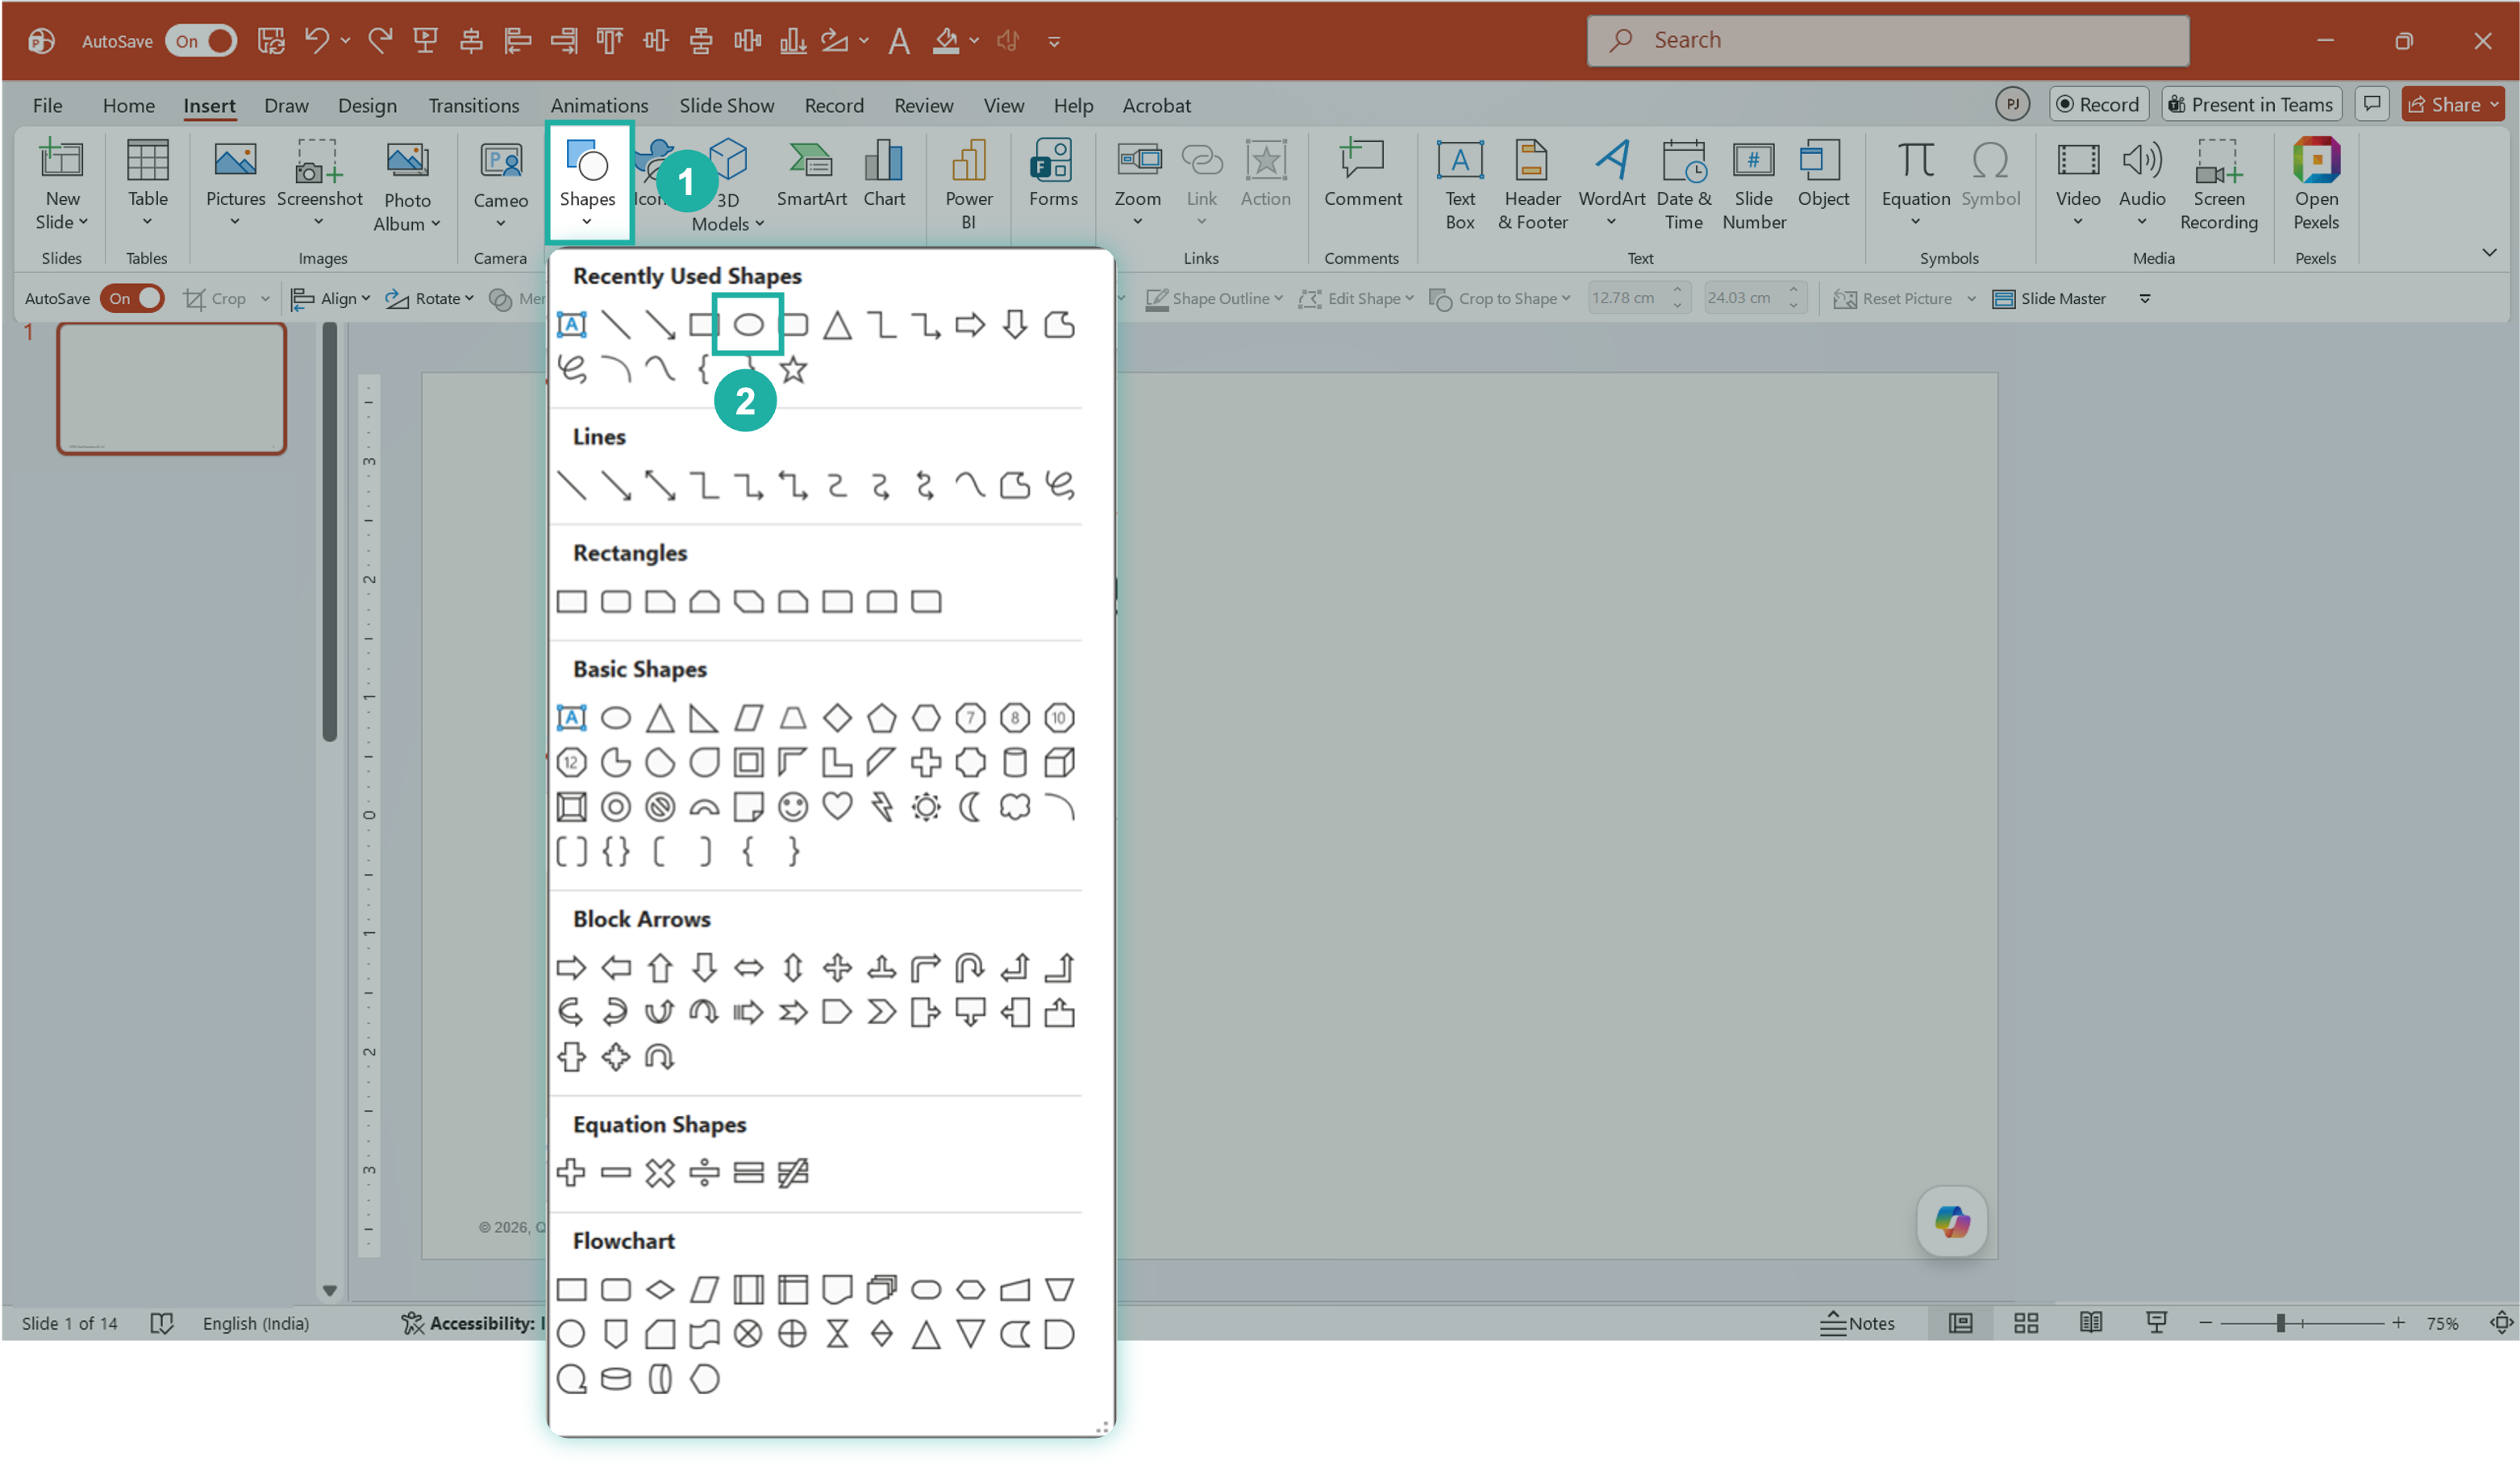
- Go to Insert and click Shapes
- From the dropdown, select your shape (we are selecting the circle)
- Click and drag on the slide to draw it. Exact dimensions do not matter yet
- Leave the fill as is. Do not add any colour yet
Open Shape Formatting
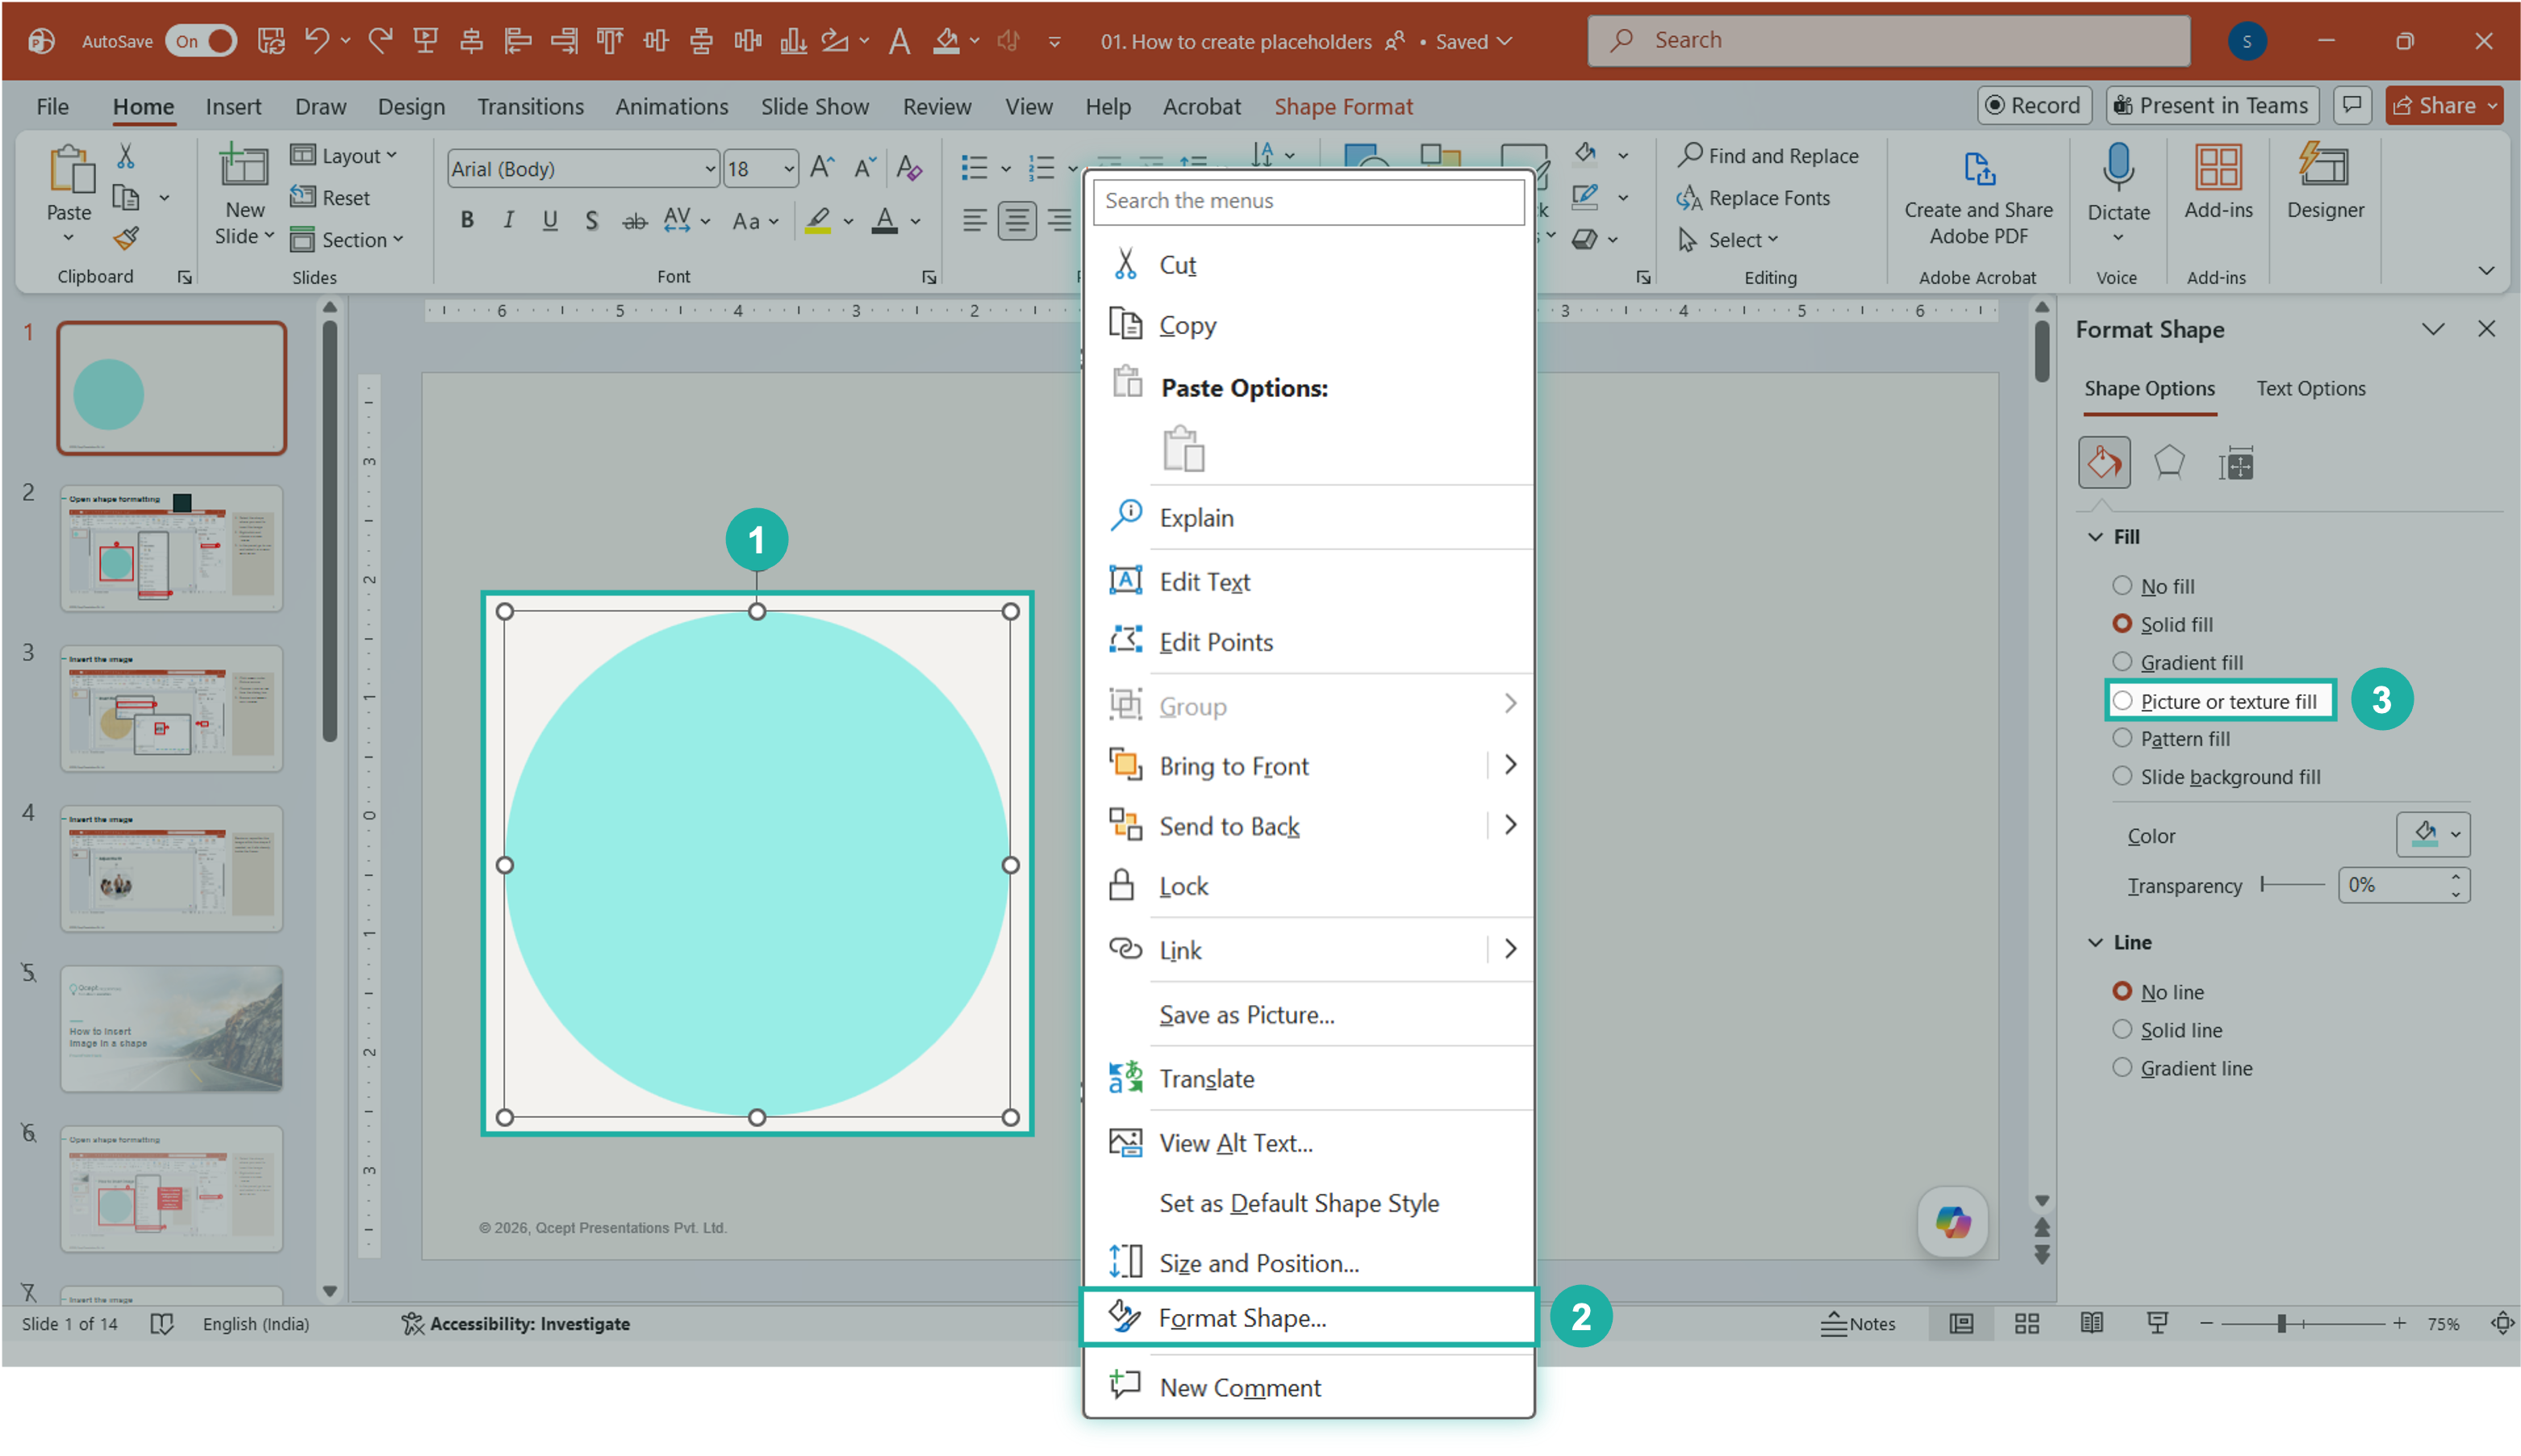
Select the shape. Right-click and choose Format Shape from the context menu. The Format Shape panel will open on the right side of your screen.
- Select the shape
- Right-click and choose Format Shape
- In the panel, go to Fill and select Picture or texture fill
This is the setting that lets your shape accept an image as its background.
Insert the Image
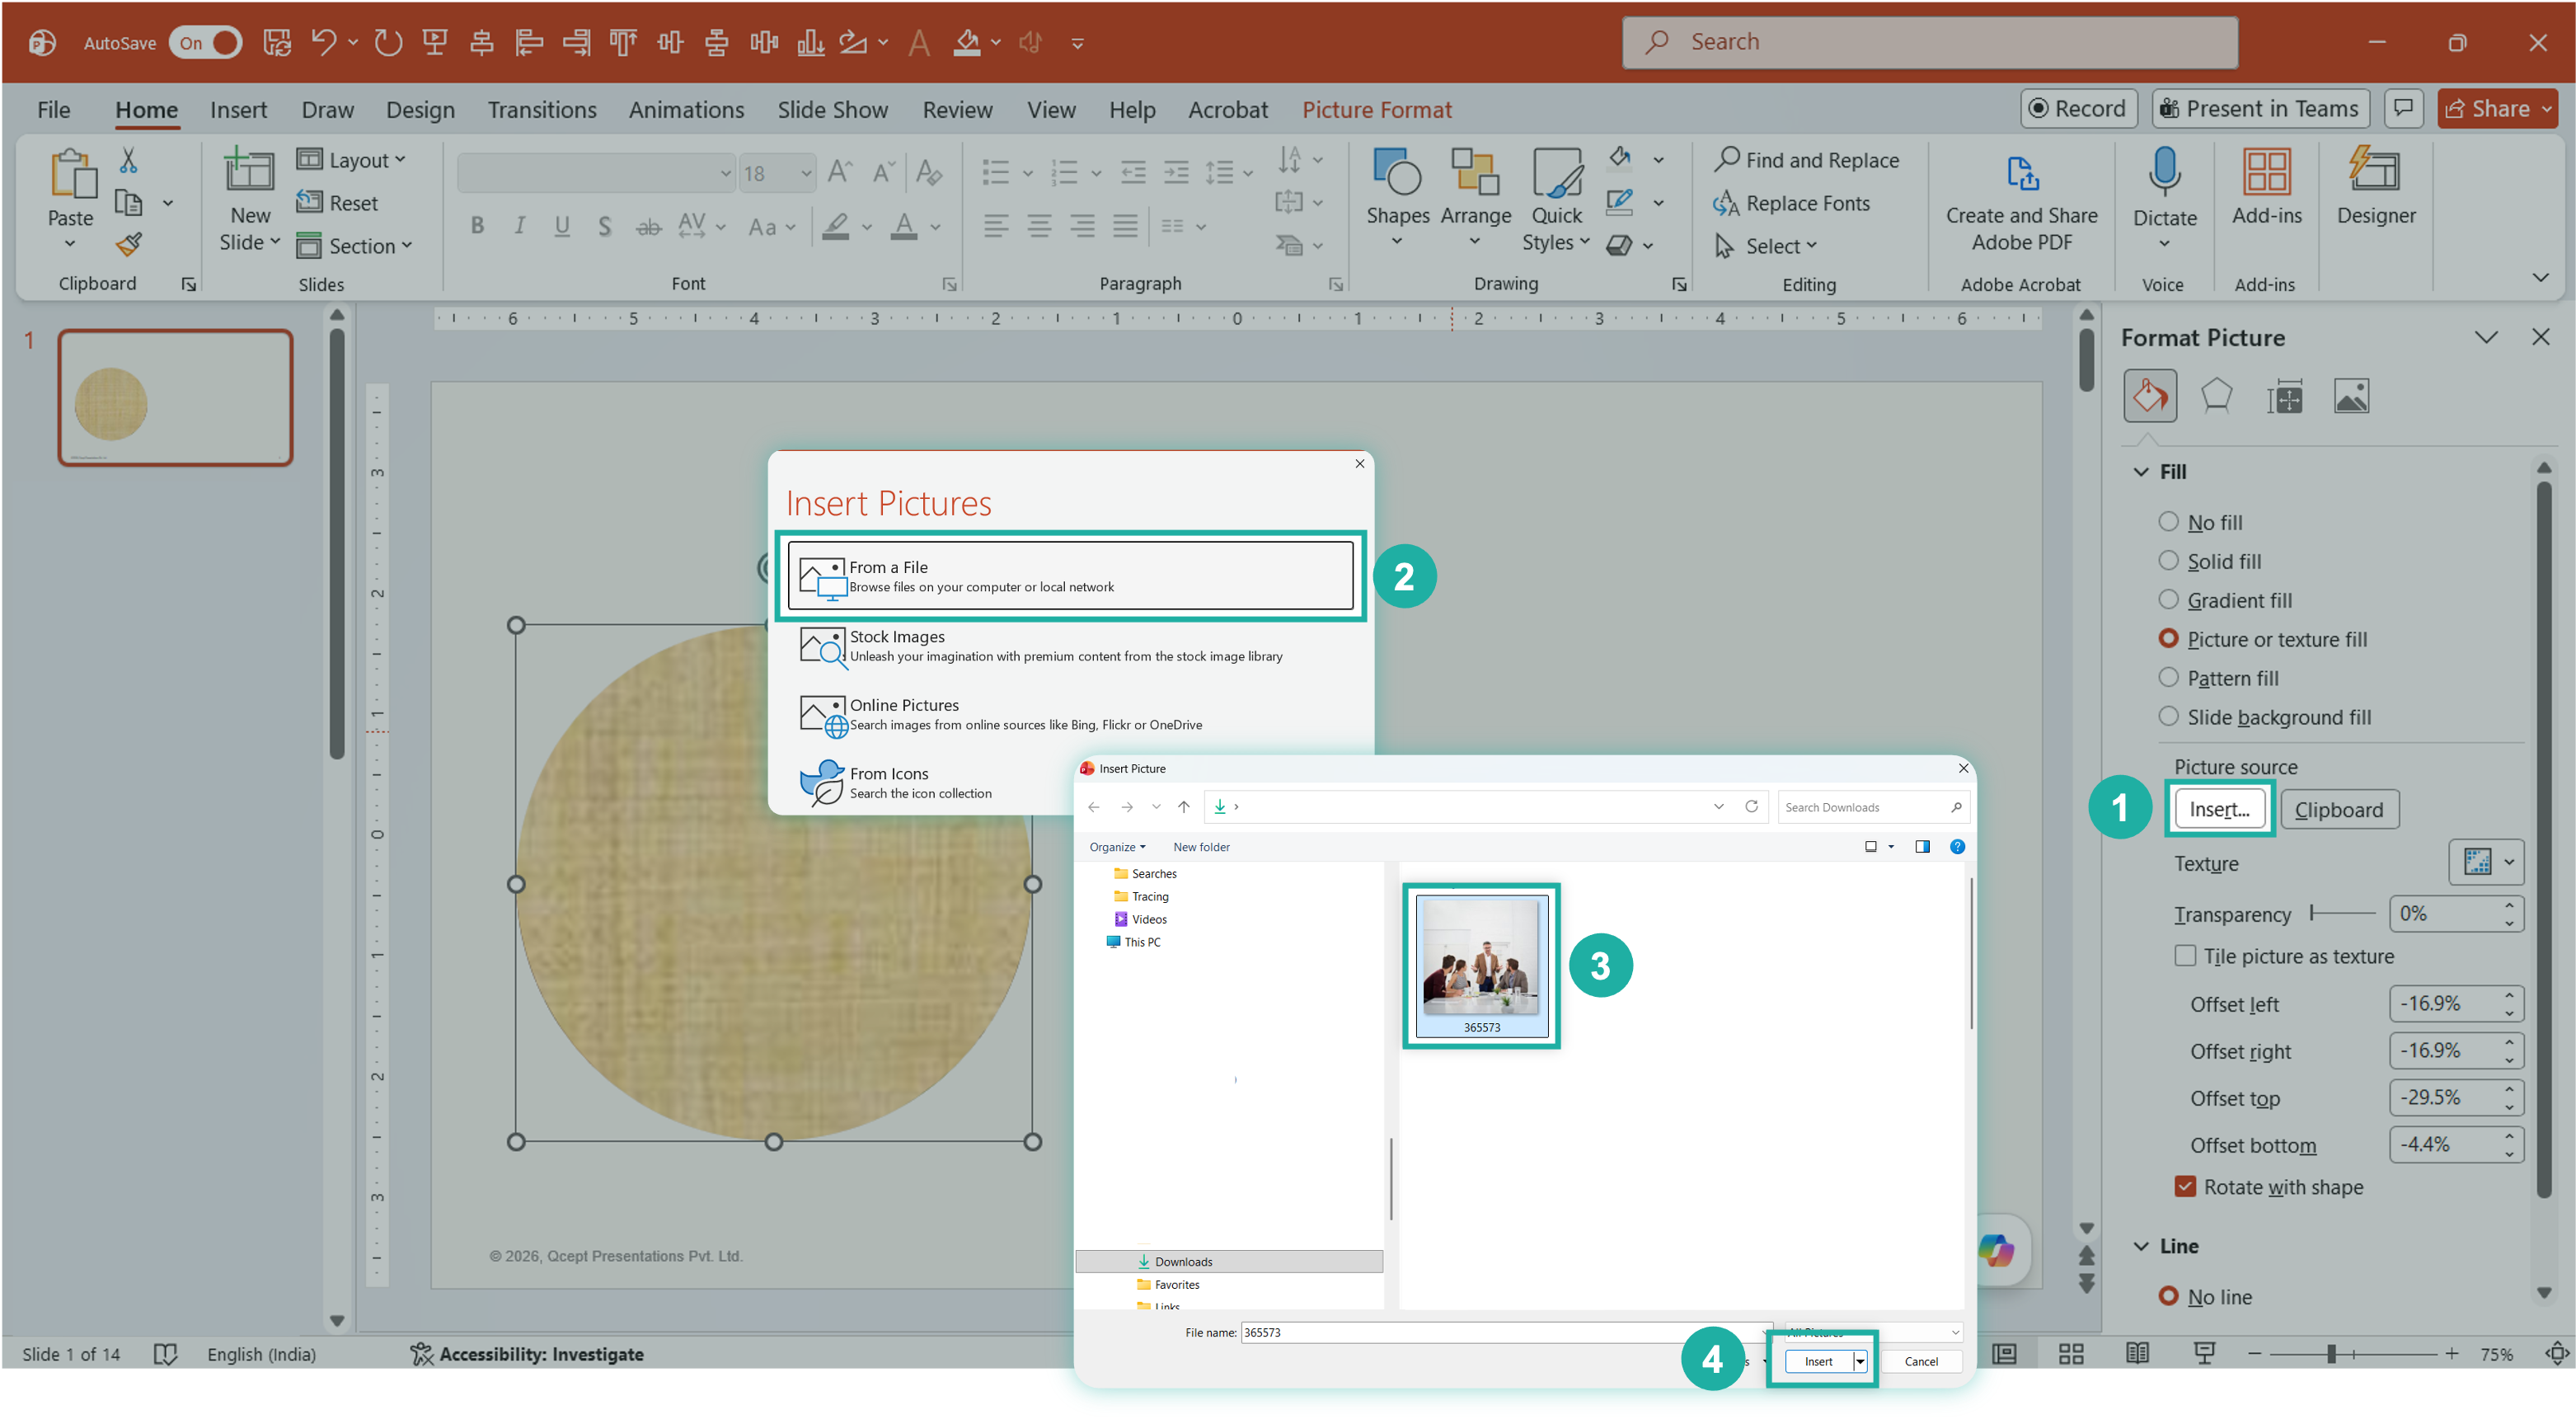
With Picture or texture fill selected, look for the Picture source section in the panel. Click Insert.
- Select the shape
- Right-click and choose Format Shape
- In the panel, go to Fill and select Picture or texture fill
This is the setting that lets your shape accept an image as its background.
Final result and what to do next
Close the Format Shape panel. Your image is now placed cleanly inside the shape. It will not spill outside the boundary regardless of how you move or resize the shape on the slide.
- Close the Format Shape panel
- Your image sits cleanly inside the shape. It will not spill regardless of how you move or resize it
- If the framing is off, right-click the shape, go to Format Picture, and use the offset controls to reposition the image within the shape. Think of it like panning inside a crop.

Pro Tip: use clipboard for faster insertion
If you have already copied an image to your clipboard, skip the file browser entirely. After selecting Picture or texture fill, click Clipboard instead of Insert. The image drops straight into the shape. This is the faster route when you are working through multiple slides and pulling images from a reference doc or a browser tab. For a full walkthrough on this method, read how to change images in PowerPoint using clipboard.
Why this matters for consulting and research decks
Most design errors in professional decks are not about taste. They are about inconsistency. A photo that is 3px too wide, a headshot that is slightly cropped differently from the one next to it, an image that shifts position when someone edits the text below it. These are not small things when a deck is going to a client.
Image placeholders solve this at the source. Once the shape is set up, anyone inserting an image into that frame gets a consistent result. The layout does not depend on whoever is editing it having the time or the eye to get it right. The structure does it for them.
For analysts building data decks with exhibit callouts, or consultants putting together proposals with client logos and team headshots, this is the kind of detail that separates a deck that reads as considered from one that just reads as assembled.
The conclusion: Building a proper image placeholder in PowerPoint takes about 30 seconds.
The payoff is every subsequent edit being predictable. For teams that handle a high volume of decks, that predictability is not a nice-to-have. It is what keeps the work from falling apart at revision three.
Three steps. Shape, fill, image. The rest is just knowing where to click.


We use storytelling and design to build high impact presentations for leading brands
PowerPoint design
services and outsourcing
Enterprises, analysts, consultants
Investor pitches
and fundraising narrative
Founders, fund managers
Sales presentations, proposals, and collaterals
Sales & marketing teams
PowerPoint template and visual slide bank
Enterprises, advisory & research firms
CXO presentations
and thought leadership
IT-BPO services & consulting firms
Financial, ESG,
and annual reports
Financial services, large enterprises
Training – PowerPoint design and visualization
Sales team, analysts, consultants
Conference and event presentations
Keynote speakers, event managers